Mastering WhatsApp: A Comprehensive Guide to Harnessing the Power of Communication
Introduction: WhatsApp has revolutionized the way we communicate, offering a convenient and versatile platform for staying connected with friends, family,...
Introduction: WhatsApp has revolutionized the way we communicate, offering a convenient and versatile platform for staying connected with friends, family,...
Introduction: In today's digital age, having an engaging website is essential for businesses, bloggers, artists, and individuals looking to establish...
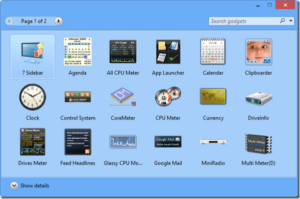
Introduction: Windows 7, released by Microsoft in 2009, introduced several innovative features that revolutionized the computing experience for users worldwide....

Introduction: In the world of digital photography and graphic design, the ability to sharpen images effectively can make a significant...

Introduction: Leyna Krow's "Fire Season: A Novel" is a mesmerizing and thought-provoking work of fiction that immerses readers in the...

Introduction: Microsoft Office has long been the go-to suite of productivity tools for individuals, students, and businesses worldwide. However, its...
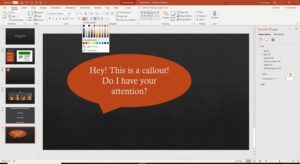
Introduction: In today's digital age, effective visual communication is essential for capturing audience attention, conveying messages clearly, and engaging viewers....