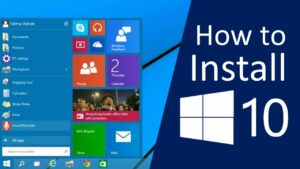
• Skip to primary navigation
  • Skip to main content

OceanofAPK

We Design Website For You

  • Home
  • Search
  • Apps Categories
  • Games Categories

Emily

Navigating the Digital Maze: A Comprehensive Guide to Solving the Most Common Computer Problems

January 1, 2024 by Emily

Introduction:

In the rapidly evolving landscape of technology, computers have become integral to our daily lives. From work to entertainment, communication to information retrieval, our dependence on computers is undeniable. However, with this increased reliance comes the inevitable occurrence of common computer problems. This comprehensive guide aims to navigate the digital maze and provide practical solutions to some of the most prevalent issues users encounter in their computing journey.

I. Slow Performance: Unraveling the Mysteries:

One of the most frequently encountered issues is the gradual slowing down of computer performance. This can be attributed to various factors, including software bloat, insufficient system resources, or the accumulation of unnecessary files and applications. Solutions to address this problem range from optimizing system settings and managing startup programs to performing routine maintenance tasks such as disk cleanup and defragmentation.

II. Virus and Malware Infections: Guarding the Digital Fortress:

Viruses, malware, and other malicious entities pose a constant threat to the security of our computers. Common symptoms include erratic behavior, unauthorized access, and data corruption. To fortify the digital fortress, users must employ robust antivirus software, regularly update their operating systems, and exercise caution when downloading files or clicking on links. In the event of an infection, swift action through malware scans and removal tools is imperative.

III. Internet Connection Woes: Navigating the Connectivity Conundrum:

In an era dominated by online interactions, disruptions in internet connectivity can be exasperating. Whether it’s a slow connection, intermittent drops, or complete outages, troubleshooting steps involve checking hardware connections, resetting routers, and contacting internet service providers. Additionally, ensuring that network drivers are up to date and minimizing interference from nearby devices can contribute to a more stable internet experience.

IV. Software Glitches and Application Crashes: Untangling the Code:

Software glitches and application crashes can disrupt productivity and cause frustration. These issues may arise from compatibility issues, outdated software, or corrupted program files. Users can troubleshoot by updating software, ensuring compatibility with the operating system, and repairing or reinstalling problematic applications. Monitoring system logs for error messages provides valuable insights into the root causes of recurring issues.

V. Hardware Failures: Diagnosing the Physical Realm:

Hardware failures, ranging from malfunctioning peripherals to faulty components, can significantly impact a computer’s functionality. Users facing hardware issues should perform diagnostics, checking connections, testing individual components, and monitoring system temperatures. In cases of hardware malfunction, timely replacements or repairs may be necessary to restore the computer to optimal performance.

VI. Data Loss and Recovery: Safeguarding the Digital Memories:

Accidental deletion, hardware failures, or system crashes can lead to the distressing prospect of data loss. Implementing regular backups, whether through external drives, cloud services, or dedicated backup software, is crucial in safeguarding important files. In the event of data loss, specialized recovery tools and services may offer a chance to retrieve seemingly lost information.

VII. Blue Screen of Death (BSOD): Decoding the Screen of Despair:

The infamous Blue Screen of Death (BSOD) is a sight dreaded by computer users, indicating a critical system error. Commonly caused by hardware or driver issues, resolving BSOD errors involves identifying the error code, updating drivers, checking hardware compatibility, and performing system integrity scans. Analyzing minidump files can provide additional insights for advanced users and IT professionals.

VIII. Overheating: Cooling the Digital Furnace:

Overheating is a prevalent issue, particularly in laptops and desktops with inadequate cooling systems. Users can combat overheating by ensuring proper ventilation, cleaning dust from cooling components, and using external cooling solutions if necessary. Monitoring system temperatures and adjusting fan settings can contribute to maintaining an optimal operating temperature.

IX. Peripheral Connection Problems: Untangling the Wired and Wireless Web:

Issues with peripherals, such as printers, keyboards, and mice, can disrupt workflow and hinder user experience. Troubleshooting involves checking physical connections, ensuring drivers are up to date, and testing peripherals on other devices if possible. Wireless connectivity problems may be resolved by troubleshooting Wi-Fi settings, updating drivers, or resetting network configurations.

X. User Account and Password Issues: Regaining Digital Access:

Password-related problems, such as forgotten passwords or compromised accounts, can impede access to vital information. Users can regain control by utilizing account recovery options, implementing secure password practices, and using password manager tools. Additionally, enabling multi-factor authentication adds an extra layer of security to user accounts.

Conclusion: Navigating the Digital Landscape with Confidence:

In conclusion, the ever-expanding digital landscape presents a myriad of challenges for computer users. However, armed with knowledge, proactive maintenance practices, and effective troubleshooting techniques, users can navigate the complexities of technology with confidence. By addressing common computer problems head-on, individuals empower themselves to make the most of their digital experience, ensuring smooth operation, enhanced security, and uninterrupted access to the vast possibilities the digital world has to offer.

A Winter Wonderland: Mastering the Art of Adding Falling Snow to Photos with Photoshop

December 31, 2023 by Emily

Introduction:

As the winter season blankets the world in a serene layer of snow, photographers and digital artists seek ways to capture the enchantment of falling snowflakes in their images. While capturing this magical moment in-camera can be challenging, Adobe Photoshop offers a creative solution. In this comprehensive guide, we will explore the step-by-step process of adding falling snow to photos, transforming ordinary scenes into winter wonderlands with the help of Photoshop’s versatile tools and features.

  1. Selecting the Right Photo:
    • Before delving into the digital realm, choose a photo that complements the addition of falling snow. Winter landscapes, festive scenes, or portraits captured against a snowy backdrop work exceptionally well. The right photo serves as the canvas for your snowfall masterpiece.
  2. Create a New Layer:
    • Open your selected image in Photoshop and create a new layer. This layer will host the falling snow, ensuring it doesn’t alter the original image. Navigate to the “Layers” panel and click on the “New Layer” icon at the bottom.
  3. Select the Brush Tool:
    • With the new layer selected, choose the Brush Tool from the toolbar. Access the Brush settings to customize the size, hardness, and opacity of the brush according to the desired snowflake effect. A soft, round brush with varying sizes works well for a natural look.
  4. Adjust Brush Opacity and Flow:
    • To mimic the subtlety of falling snow, adjust the brush opacity and flow settings. Lower opacity ensures a translucent appearance, while adjusting flow controls the gradual buildup of snowflakes as you paint.
  5. Set Foreground Color to White:
    • Since snowflakes are typically white, set the foreground color to white. This allows you to paint snowflakes onto the new layer seamlessly. You can access the color picker or simply press the “D” key to set the default colors.
  6. Paint Snowflakes onto the Layer:
    • Start painting snowflakes onto the new layer, focusing on areas where you want the snowfall effect. Experiment with different brush sizes and opacities to achieve a realistic distribution of snowflakes. Varying the size and opacity creates depth in the falling snow.
  7. Randomize Snowflake Placement:
    • Embrace the organic nature of falling snow by avoiding uniform patterns. Randomize the placement of snowflakes, varying their sizes and spacing. This step contributes to a more natural and visually appealing snowfall effect.
  8. Duplicate and Transform Layers:
    • To enhance the density of the falling snow, duplicate the snow layer. Adjust the opacity or apply transformations (Edit > Free Transform) to create layers with different intensities and perspectives. This layering technique adds depth and realism to the falling snow effect.
  9. Blur and Adjust Opacity:
    • To simulate the depth-of-field associated with falling snow, apply a Gaussian Blur to selected snowflake layers. Additionally, adjust the opacity of individual layers to create a nuanced and visually pleasing snowfall effect that integrates seamlessly with the background.
  10. Use Filters for Realism:
    • Experiment with Photoshop filters to enhance the realism of falling snow. The “Add Noise” filter can add subtle texture, while the “Motion Blur” filter can simulate the movement of falling snowflakes. Tweak the filter settings to achieve the desired effect.
  11. Add Depth with Adjustment Layers:
    • Introduce depth and tone to the snowfall by utilizing adjustment layers. Consider adding a subtle blue tint with a Color Balance adjustment layer to mimic the cool winter atmosphere. Experiment with other adjustments like Levels and Curves to fine-tune the overall appearance.
  12. Integrate with the Background:
    • Ensure that the falling snow integrates seamlessly with the background. Adjust the blending mode of the snow layers to “Screen” or “Lighten” to allow the underlying scene to show through. Fine-tune the opacity and blending modes until the snowfall feels harmonious with the image.
  13. Refine with Layer Masks:
    • Refine the falling snow effect using layer masks. This allows you to selectively reveal or conceal parts of the snowfall, ensuring that it interacts realistically with the elements in the image. A soft brush on the layer mask helps blend the snow into the scene.
  14. Consider Foreground and Background Elements:
    • Pay attention to the interaction between the falling snow and foreground or background elements. Adjust the size and opacity of snowflakes based on their perceived distance from the viewer, creating a sense of depth and perspective.
  15. Final Touches and Global Adjustments:
    • To unify the image, apply global adjustments to the entire composition. This may include tweaking overall brightness, contrast, or color balance. Ensure that the falling snow contributes to the atmospheric and cohesive feel of the winter scene.

Optimizing Workflow for Efficiency:

  1. Snowflake Brush Presets:
    • Save time by creating custom snowflake brush presets. Design and save various snowflake shapes as brushes, allowing for quick and efficient application with a single click.
  2. Action Scripts for Consistency:
    • Create Photoshop actions or scripts to automate the process for consistency across multiple images. This proves especially beneficial when working on a series of winter-themed photos.
  3. Utilize Particle Brushes:
    • Explore the use of particle brushes in Photoshop for a more dynamic and varied snowfall effect. These brushes simulate the randomness of falling snowflakes, adding an extra layer of realism to your compositions.
  4. Overlay Textures for Texture Variation:
    • Overlaying textures on the snow layers can introduce subtle variations in the snowfall. Experiment with snowflake textures or subtle noise patterns to enhance the overall texture and complexity of the falling snow.

Conclusion:

Adding falling snow to photos with Photoshop transforms ordinary scenes into winter wonderlands, providing a canvas for creativity and storytelling. By mastering the art of creating realistic snowfall effects, digital artists and photographers can evoke the magic of winter in their visual narratives. Whether enhancing holiday portraits, creating festive scenes, or capturing the serenity of a snowy landscape, the versatile tools and features of Photoshop offer endless possibilities for bringing the enchantment of falling snow to life. As you embark on your winter-themed projects, let your creativity flourish, and may your digital snowfall be as captivating as the real thing.

Mastering Visual Transitions: Accelerating Image Fading with Live Gradients in Photoshop CC

December 31, 2023 by Emily

Introduction:

Adobe Photoshop CC, the industry-standard software for digital imaging and design, is renowned for its versatility and constant innovation. Among the myriad features that empower creatives, the introduction of Live Gradients in Photoshop CC marks a significant leap forward in image editing capabilities. In this extensive guide, we’ll delve into the art of seamlessly fading an image to color using Live Gradients, exploring the intricacies of this powerful tool and unveiling techniques to expedite the process.

Understanding Live Gradients:

Live Gradients, a groundbreaking addition to Photoshop CC, revolutionize the way designers and photographers approach color transitions within images. Unlike traditional gradients, Live Gradients provide real-time, non-destructive control over color blending, enabling users to dynamically adjust and experiment with colors directly on the canvas. This feature proves invaluable when fading an image to color, offering a more intuitive and efficient workflow.

Step-by-Step Guide: Fading an Image to Color with Live Gradients

  1. Open Your Image in Photoshop:
    • Begin by launching Photoshop CC and opening the image you want to work with. Ensure that the Layers panel is visible, as it will be crucial for managing the Live Gradients.
  2. Create a New Layer:
    • To maintain the original image as a background layer, create a new layer by clicking on the “New Layer” icon at the bottom of the Layers panel. This new layer will be the canvas on which the Live Gradient is applied.
  3. Select the Gradient Tool:
    • Locate the Gradient Tool in the toolbar on the left side of the screen. If it’s not visible, click and hold on the Paint Bucket Tool to reveal additional tools, including the Gradient Tool.
  4. Choose a Gradient Type:
    • With the Gradient Tool selected, navigate to the options bar at the top of the screen. Here, you’ll find a dropdown menu where you can choose the type of gradient. Opt for the “Foreground to Transparent” gradient for a smooth fade.
  5. Set Gradient Colors:
    • Click on the gradient preview to open the Gradient Editor. Adjust the colors of your gradient by manipulating the color stops. Choose the color to which you want the image to fade and ensure the other color stop is set to transparent.
  6. Apply the Gradient:
    • On the new layer, click and drag the Gradient Tool from the top to the bottom or left to right, depending on the desired direction of the fade. The Live Gradient will dynamically apply the color transition in real-time.
  7. Adjusting Live Gradient Parameters:
    • To refine the fade effect, explore the Live Gradient parameters. In the Layers panel, you’ll find a gradient fill layer. Double-click on the thumbnail to open the Gradient Fill dialog box, where you can further adjust colors, opacity, and blending modes.
  8. Experiment with Blending Modes:
    • Enhance the visual impact of the fade by experimenting with blending modes for the Live Gradient layer. Overlay, Soft Light, and Screen are often effective for creating seamless transitions.
  9. Fine-Tune with Layer Masks:
    • For more precise control, add a layer mask to the Live Gradient layer. Use a soft brush to mask areas where you want the original image to show through, allowing for nuanced adjustments in specific regions.
  10. Explore Gradient Maps:
    • Take your image fading to the next level by exploring Gradient Maps. This feature maps specific colors to different tonal values in the image, providing a comprehensive approach to color adjustments.

Optimizing Workflow for Faster Results:

  1. Keyboard Shortcuts:
    • Familiarize yourself with keyboard shortcuts associated with Live Gradients to expedite your workflow. Shortcuts for toggling the visibility of layers, adjusting opacity, and navigating through gradient types can significantly enhance your efficiency.
  2. Custom Presets:
    • Save time by creating custom gradient presets for common color transitions. This allows you to quickly apply predefined gradients without manually adjusting colors each time.
  3. Utilize Smart Objects:
    • Convert your image layer into a Smart Object before applying Live Gradients. This preserves the original image and allows for non-destructive editing, providing flexibility in fine-tuning the fade effect.
  4. Batch Processing:
    • If you’re working with multiple images that require a similar fade effect, consider using Photoshop’s batch processing capabilities. Create an action that includes the steps for applying Live Gradients, and apply it to a batch of images for consistent results.
  5. Leverage Actions and Scripts:
    • Explore the potential of Photoshop actions and scripts for automating repetitive tasks. Create an action that encapsulates the steps for fading an image to color with Live Gradients, saving you time and effort in the long run.
  6. Utilize Adjustment Layers:
    • Combine Live Gradients with adjustment layers to refine the overall tone and color balance of your image. Adjustment layers like Curves, Levels, and Hue/Saturation can complement the fade effect for a more polished result.

Conclusion:

The introduction of Live Gradients in Photoshop CC heralds a new era of efficiency and creativity for digital artists. Fading an image to color becomes an intuitive and dynamic process, allowing for real-time adjustments and experimentation. By mastering the intricacies of Live Gradients and implementing optimization strategies, designers and photographers can elevate their work, achieving visually stunning and seamless image fades with unprecedented speed and precision. As Adobe continues to innovate, the combination of Live Gradients and traditional Photoshop capabilities positions digital creatives to explore new realms of visual storytelling and expression.

Mastering Efficiency: A Comprehensive Guide to Harnessing the Power of the Enhanced Properties Panel in Photoshop CC 2020

December 31, 2023 by Emily

Introduction:

In the ever-evolving landscape of digital design, Adobe Photoshop remains a stalwart companion for creatives seeking precision and efficiency in their projects. With each new iteration, the software introduces enhancements to streamline workflows and empower users with more intuitive tools. One such milestone in Photoshop’s evolution is the Enhanced Properties Panel, a feature introduced in Photoshop CC 2020. In this exhaustive guide, we will embark on a journey through the intricacies of the Enhanced Properties Panel, exploring its myriad functionalities, tips for optimization, and the ways it transforms the digital design experience.

Understanding the Enhanced Properties Panel:

The Enhanced Properties Panel in Photoshop CC 2020 serves as a centralized hub for managing layer properties, styles, and adjustment settings. It consolidates key information and controls, providing users with a more streamlined and accessible interface for making edits and adjustments. Let’s delve into the core elements and features that define this powerful addition to Photoshop.

  1. Layer Management Made Effortless:
    • The Enhanced Properties Panel revolutionizes layer management by displaying key information about the selected layer prominently. From layer type and blending mode to opacity and fill settings, users can swiftly access and adjust these parameters without navigating through multiple menus.
  2. One-Click Access to Layer Styles:
    • With a simple click, users can access and apply layer styles directly from the Enhanced Properties Panel. This feature eliminates the need to navigate through menus, providing a more direct and efficient way to enhance layers with shadows, glows, gradients, and other stylistic elements.
  3. Adjustment Layers at Your Fingertips:
    • The Enhanced Properties Panel puts adjustment layers at users’ fingertips, allowing for quick and intuitive adjustments to brightness, contrast, hue, saturation, and more. This streamlined access facilitates a non-destructive editing workflow, where adjustments can be fine-tuned with ease.
  4. Text Layer Enhancements:
    • When working with text layers, the Enhanced Properties Panel offers a host of improvements. Users can easily adjust character and paragraph settings, such as font size, leading, and tracking, right from the panel. This real-time editing capability enhances the precision and efficiency of text-based designs.
  5. Smart Object Integration:
    • Smart Objects, a powerful feature in Photoshop, seamlessly integrates with the Enhanced Properties Panel. Users can access and modify Smart Object properties, such as transformation options and filters, directly from the panel, streamlining the process of working with complex, non-destructive layers.
  6. Effortless Shape and Vector Editing:
    • For users working extensively with shapes and vectors, the Enhanced Properties Panel simplifies the editing process. From adjusting stroke and fill settings to fine-tuning shape properties, this feature provides a centralized space for managing all aspects of vector-based designs.
  7. Live Blending Mode Previews:
    • A standout feature of the Enhanced Properties Panel is its live blending mode previews. Users can cycle through different blending modes and witness real-time previews of how each mode affects the selected layer. This interactive approach enhances the decision-making process when choosing the most suitable blending mode for a specific effect.
  8. Color Harmony Integration:
    • The Enhanced Properties Panel integrates Color Harmony functionality, offering a color wheel and harmony rules for precise color adjustments. Users can experiment with color schemes, create complementary palettes, and adjust color variations directly within the panel, promoting a more intuitive and creative approach to color manipulation.

Optimizing Workflow with the Enhanced Properties Panel:

  1. Customization for Efficiency:
    • Take advantage of the Enhanced Properties Panel’s customizable layout. Tailor the panel to your specific workflow by organizing and prioritizing the properties that matter most to your design process. This customization ensures that the panel aligns seamlessly with your unique requirements.
  2. Keyboard Shortcuts and Hotkeys:
    • Familiarize yourself with keyboard shortcuts and hotkeys associated with the Enhanced Properties Panel. Quick access to specific features and settings can significantly speed up your workflow, allowing for a more fluid and responsive design experience.
  3. Utilize Contextual Menus:
    • Right-clicking within the Enhanced Properties Panel unveils contextual menus with additional options. Explore these menus to discover hidden functionalities and shortcuts that can further optimize your interaction with the panel.
  4. Integrate with Creative Cloud Libraries:
    • Leverage the power of Creative Cloud Libraries by integrating them with the Enhanced Properties Panel. Accessing design assets, styles, and colors directly from the panel enhances collaboration and ensures a consistent design language across projects.
  5. Stay Updated with New Features:
    • Adobe frequently updates its software, introducing new features and enhancements. Stay informed about the latest updates to the Enhanced Properties Panel and other Photoshop features, as these updates often bring increased functionality and improved user experiences.

Conclusion:

The Enhanced Properties Panel in Photoshop CC 2020 represents a paradigm shift in how designers, photographers, and digital artists interact with their work. Its centralized approach to layer management, styling, and adjustments fosters a more efficient and intuitive design process. By understanding the intricacies of the Enhanced Properties Panel and optimizing its use within your workflow, you unlock the full potential of Photoshop CC 2020, transforming your digital design experience into a seamless and empowering journey. As Adobe continues to innovate, this feature stands as a testament to the company’s commitment to providing tools that empower creativity in the ever-evolving landscape of digital design.

A Deep Dive into the Evolution: Unveiling the New Features and Enhancements of Adobe Photoshop CC 2019

December 31, 2023 by Emily

Introduction:

Adobe Photoshop, the venerable image editing software, has been a stalwart companion for creative professionals and enthusiasts alike for decades. With each new iteration, Adobe pushes the boundaries of what’s possible in digital image manipulation, and Photoshop CC 2019 is no exception. In this extensive exploration, we will unravel the myriad advancements, features, and enhancements that make Photoshop CC 2019 a groundbreaking tool for visual artists, photographers, and designers.

  1. Revolutionizing Content-Aware Fill:
    • At the forefront of the new features is an overhauled Content-Aware Fill. This iteration, often dubbed Content-Aware Fill 2.0, harnesses advanced algorithms to deliver more accurate and seamless results when removing unwanted elements from images. The enhanced precision marks a significant stride forward in the realm of retouching and photo manipulation.
  2. Introducing the Frame Tool:
    • The Frame Tool is a notable addition that simplifies the process of working with images in predefined shapes. This tool is a boon for designers, allowing them to insert images into frames and resize them without compromising the content. It introduces a level of flexibility and precision that redefines layout design.
  3. Symmetry Mode for Artistic Precision:
    • Catering to the needs of digital painters and illustrators, Photoshop CC 2019 introduces Symmetry Mode. This feature enables users to paint in perfect symmetry along a customizable axis, unlocking new possibilities for creating intricate patterns, designs, and illustrations with unparalleled ease.
  4. Proportional Transformation for Enhanced Control:
    • Proportional Transformation emerges as a game-changer, empowering users to scale and transform multiple layers simultaneously while maintaining proportional relationships. This refinement streamlines the design process, offering a more intuitive and efficient workflow.
  5. Live Blend Mode Preview:
    • Streamlining the decision-making process for blend modes, Photoshop CC 2019 introduces Live Blend Mode Preview. Users can now witness real-time previews of how different blend modes impact an image, allowing for quicker and more informed selections to achieve desired effects.
  6. Usability Improvements for Seamless Interaction:
    • In response to user feedback, Adobe has implemented subtle yet impactful changes to the user interface, emphasizing improved usability. From simplified tooltips to more accessible settings, these enhancements contribute to a smoother and more intuitive user experience.
  7. Enhanced Transform Warp for Precision Distortion:
    • Transform Warp undergoes a significant upgrade, offering additional control points for precise manipulation of object shapes. This enhancement provides designers with greater flexibility in transforming and distorting elements within an image.
  8. Multiple Undo for Non-Linear Editing:
    • Addressing a long-standing user request, Photoshop CC 2019 introduces Multiple Undo functionality. Users can now step back through multiple actions, enabling a non-linear approach to the editing process and enhancing overall flexibility.
  9. Auto-Commit for Streamlined Editing:
    • Auto-Commit is a subtle but impactful addition that automatically applies changes as soon as they are made, eliminating the need to press Enter or Return after each adjustment. This feature contributes to a more fluid and efficient editing experience.
  10. Improved Free Transform for Greater Flexibility:
    • Free Transform sees improvements with more intuitive scaling options. Users can now scale and rotate objects freely while maintaining a reference point, offering greater flexibility in achieving precise transformations.
  11. Enhanced Color Wheel for Intuitive Color Selection:
    • The Color Wheel undergoes a visual overhaul, providing a more intuitive way to choose and adjust colors. With improved interactivity and a broader range of color options, designers can fine-tune their color choices with unparalleled precision.
  12. Blend If Improvements for Seamless Blending:
    • Adobe introduces enhancements to the Blend If feature, allowing users to make more nuanced adjustments to the visibility of layers based on their luminance values. This refinement adds a layer of sophistication to blending layers seamlessly.
  13. Real-Time Healing Brush for Immediate Previews:
    • The Healing Brush tool receives a significant upgrade with real-time previews of changes before applying them. This allows users to assess and fine-tune their edits on the fly, resulting in a more efficient and accurate retouching process.
  14. Enhanced Transform Proportions for Consistent Scaling:
    • The Transform Proportions feature receives a boost with added controls for maintaining the original aspect ratio of a layer during transformations. This enhancement ensures that users can scale and resize elements with precision and consistency.
  15. Auto Frame for Panoramas for Effortless Stitching:
    • Simplifying the creation of panoramas, the Auto Frame feature automatically adjusts the canvas size when stitching together panoramic images. This streamlines the workflow for photographers working with panoramic shots.
  16. Improved Match Font for Accurate Typography Matching:
    • Match Font functionality is enhanced with better accuracy in identifying and matching fonts within images. This improvement aids designers in replicating or complementing existing typography in their projects.
  17. Enhanced Export As for Streamlined Exporting:
    • The Export As feature receives improvements in Photoshop CC 2019, offering more control over exported file formats and settings. This enhancement streamlines the process of exporting images for various platforms and purposes.
  18. Enhanced Content-Aware Scale for Selective Adjustments:
    • Content-Aware Scale now provides users with more control over the scaling of selected objects while preserving essential details. This enhancement is particularly useful for adjusting the proportions of specific elements within an image.
  19. Improved Stock Templates for Diverse Creative Needs:
    • Accessing templates for various design projects is made easier with the inclusion of improved stock templates. Photoshop CC 2019 provides a more extensive library of templates, catering to a diverse range of creative needs.
  20. Enhanced Performance for a Smooth Editing Experience:
    • Adobe continues to prioritize performance improvements in Photoshop CC 2019, ensuring a smoother and more responsive experience. From faster loading times to improved brush responsiveness, these enhancements contribute to a more efficient editing workflow.

Conclusion:

Adobe Photoshop CC 2019 emerges as a testament to Adobe’s unwavering commitment to innovation and meeting the evolving needs of creative professionals. The extensive array of features, ranging from enhanced content-aware tools to usability improvements, redefines the landscape of digital image editing. Whether you are a seasoned designer, photographer, or an aspiring creative enthusiast, Adobe Photoshop CC 2019 stands as a powerful and versatile tool, empowering users to bring their creative visions to life with unprecedented precision and efficiency. The evolution of Photoshop continues, and with CC 2019, Adobe paves the way for a new era of digital creativity.

Unveiling Innovation: A Comprehensive Exploration of the Top 20 New Features in Adobe Photoshop CC 2019

December 31, 2023 by Emily

Introduction:

Adobe Photoshop CC 2019, the latest iteration of the iconic image editing software, has taken the design and photography world by storm with its array of groundbreaking features. Released with a promise of enhanced creativity and efficiency, Photoshop CC 2019 introduces a host of tools and functionalities that redefine the possibilities of digital image manipulation. In this in-depth review, we will explore the top 20 new features that make Adobe Photoshop CC 2019 a game-changer for creative professionals and enthusiasts alike.

  1. Content-Aware Fill 2.0:
    • Building upon its predecessor, Content-Aware Fill 2.0 employs advanced algorithms to seamlessly remove unwanted elements from images. The improved accuracy and efficiency make retouching and photo manipulation more intuitive and natural.
  2. Frame Tool:
    • The Frame Tool simplifies the process of masking and inserting images into specific shapes. Designers can easily place images into frames and resize them without distorting the content, offering a more flexible and precise approach to layout design.
  3. Symmetry Mode:
    • Ideal for digital painters and illustrators, Symmetry Mode allows users to paint in perfect symmetry along a customizable axis. This feature opens up new possibilities for creating intricate patterns, designs, and illustrations with greater ease.
  4. Proportional Transformation:
    • Photoshop CC 2019 introduces the Proportional Transformation feature, enabling users to scale and transform multiple layers simultaneously while maintaining proportional relationships. This streamlines the design process and enhances overall workflow efficiency.
  5. Live Blend Mode Preview:
    • A significant enhancement for users working with blend modes, the Live Blend Mode Preview provides a real-time preview of how different blend modes affect an image. This allows for quicker and more informed decisions when selecting the appropriate blend mode for a particular effect.
  6. Usability Improvements:
    • The user interface of Photoshop CC 2019 undergoes subtle yet impactful changes, emphasizing improved usability. From simplified tooltips to more accessible settings, these enhancements contribute to a smoother and more intuitive user experience.
  7. Enhanced Transform Warp:
    • Transform Warp gets a boost with added control points, making it easier for users to precisely manipulate the shape of an object or selection. This enhancement offers greater flexibility in transforming and distorting elements within an image.
  8. Multiple Undo:
    • A long-awaited feature, Multiple Undo allows users to step back through multiple actions, providing greater flexibility in the editing process. This improvement is particularly beneficial for users who prefer a non-linear approach to their workflow.
  9. Auto-Commit:
    • Auto-Commit streamlines the editing process by automatically applying changes as soon as they are made. This feature eliminates the need to press Enter or Return after each adjustment, saving time and enhancing the overall fluidity of the editing experience.
  10. Improved Free Transform:
    • Free Transform sees enhancements with more intuitive scaling options. Users can now scale and rotate objects freely while maintaining a reference point, making it easier to achieve precise transformations.
  11. Enhanced Color Wheel:
    • The Color Wheel in Photoshop CC 2019 undergoes a makeover, offering a more visually intuitive way to choose and adjust colors. With improved interactivity and a more extensive range of color options, designers can fine-tune their color choices with greater precision.
  12. Blend If Improvements:
    • Adobe introduces improvements to the Blend If feature, allowing users to make more nuanced adjustments to the visibility of layers based on their luminance values. This enhancement adds a layer of sophistication to blending layers seamlessly.
  13. Real-Time Healing Brush:
    • The Healing Brush tool receives an upgrade, providing real-time previews of the changes before applying them. This allows users to assess and fine-tune their edits on the fly, resulting in a more efficient and accurate retouching process.
  14. Enhanced Transform Proportions:
    • The Transform Proportions feature gets a boost with added controls for maintaining the original aspect ratio of a layer during transformations. This enhancement ensures that users can scale and resize elements with precision and consistency.
  15. Auto Frame for Panoramas:
    • Simplifying the process of creating panoramas, the Auto Frame feature automatically adjusts the canvas size when stitching together panoramic images. This streamlines the workflow for photographers working with panoramic shots.
  16. Improved Match Font:
    • Match Font functionality is enhanced with better accuracy in identifying and matching fonts within images. This improvement aids designers in replicating or complementing existing typography in their projects.
  17. Enhanced Export As:
    • The Export As feature receives improvements in Photoshop CC 2019, offering more control over exported file formats and settings. This enhancement streamlines the process of exporting images for various platforms and purposes.
  18. Enhanced Content-Aware Scale:
    • Content-Aware Scale now provides users with more control over the scaling of selected objects while preserving important details. This enhancement is particularly useful for adjusting the proportions of specific elements within an image.
  19. Improved Stock Templates:
    • Accessing templates for various design projects is made easier with the inclusion of improved stock templates. Photoshop CC 2019 provides a more extensive library of templates, catering to a diverse range of creative needs.
  20. Enhanced Performance:
    • Adobe continues to prioritize performance improvements in Photoshop CC 2019, ensuring a smoother and more responsive experience. From faster loading times to improved brush responsiveness, these enhancements contribute to a more efficient editing workflow.

Conclusion:

Adobe Photoshop CC 2019 stands as a testament to Adobe’s commitment to innovation and meeting the evolving needs of creative professionals. With a diverse array of features ranging from enhanced content-aware tools to usability improvements, this version of Photoshop redefines the possibilities of digital image editing. Whether you are a seasoned designer, photographer, or an aspiring creative enthusiast, Adobe Photoshop CC 2019 offers a robust set of tools that empower users to bring their creative visions to life with unprecedented precision and efficiency.

Unmasking Creativity: Mastering the Focus Area Selection in Photoshop CC 2014

December 30, 2023 by Emily

In the intricate world of digital image editing, precision and control are paramount. Adobe Photoshop, a stalwart in the creative toolkit, continually evolves to meet the demands of discerning designers and photographers. Among the transformative features introduced in Photoshop CC 2014, the Focus Area Selection tool emerged as a game-changer. This article delves into the nuances of Focus Area Selection, unraveling its capabilities, and showcasing how it unmasked a new realm of creative possibilities.

The Quest for Precision in Image Editing

From Lasso to Advanced Selection Techniques: Evolution in Selection Tools:

The journey of selection tools in Photoshop has seen a remarkable evolution. From the rudimentary Lasso tool to more sophisticated options like Quick Selection and Magic Wand, designers and photographers have long sought efficient ways to isolate elements in their compositions. However, the quest for precision persisted, particularly when dealing with complex subjects or intricate details.

Photoshop CC 2014: The Focus Area Selection Revelation:

Photoshop CC 2014 heralded a significant leap in the realm of selection tools with the introduction of the Focus Area Selection tool. This feature was designed to address the challenges posed by intricate subject matter and complex backgrounds. By leveraging advanced algorithms, Focus Area Selection promised to analyze images intelligently and create detailed selections, unmasking the potential for refined editing and creative experimentation.

Unveiling the Capabilities of Focus Area Selection

Automated Intelligence: Letting Algorithms Work for You:

At the heart of Focus Area Selection lies its automated intelligence. Unlike traditional selection tools that rely heavily on manual inputs, this tool employs sophisticated algorithms to analyze the image and identify areas of focus. By understanding the contrast and detail within the composition, Focus Area Selection intelligently generates a preliminary selection, laying the groundwork for more nuanced edits.

Refinement Options: Tailoring Selections to Perfection:

While automated selection is a powerful starting point, Photoshop CC 2014 goes a step further by providing refinement options within the Focus Area Selection tool. Designers can fine-tune their selections by using the Refine Edge dialog, which offers controls for adjusting the selection’s edges, feathering, and smoothing. This level of refinement empowers users to achieve selections that seamlessly integrate with the surrounding elements, eliminating jagged edges or artifacts.

Subject Isolation: Crafting Detailed and Complex Selections:

One of the standout features of Focus Area Selection is its ability to handle complex subject matter. Whether it’s intricate patterns, detailed foliage, or subjects with fine textures, the tool excels at isolating these elements with precision. This capability is particularly valuable in scenarios where traditional selection tools might struggle, offering a lifeline to designers and photographers working on projects that demand meticulous attention to detail.

Integration with Smart Objects: Non-Destructive Editing Paradigm:

Photoshop CC 2014’s Focus Area Selection integrates seamlessly with Smart Objects, aligning with the non-destructive editing paradigm. By converting selections into Smart Objects, users retain the flexibility to revisit and modify their edits without compromising image quality. This integration adds a layer of versatility to the Focus Area Selection tool, enabling iterative refinement and experimentation in the creative process.

Mastering Focus Area Selection in Workflows

Portrait Retouching: Fine-Tuning Facial Features with Precision:

For portrait photographers and retouchers, Focus Area Selection is a boon. The tool’s ability to discern facial features, including intricate details like hair strands, allows for targeted and precise retouching. Whether it’s enhancing eyes, smoothing skin, or refining hair textures, the Focus Area Selection tool becomes an indispensable asset in achieving professional-grade portrait edits.

Product Photography: Isolating Products for Immaculate Presentations:

In the realm of e-commerce and product photography, presenting items with immaculate detail is paramount. The Focus Area Selection tool facilitates the isolation of products from complex backgrounds, allowing designers to showcase items with clarity and precision. This is particularly valuable when creating product catalogs, web banners, or promotional materials where visual appeal is a key factor.

Nature and Landscape Photography: Embracing the Details of the Outdoors:

Nature and landscape photographers often grapple with the challenge of isolating intricate details within a larger scene. The Focus Area Selection tool shines in such scenarios, allowing photographers to highlight specific elements—such as individual leaves, flowers, or wildlife—without compromising the integrity of the broader composition. This capability empowers nature photographers to convey the richness of the outdoors with unparalleled detail.

Graphic Design: Efficient Isolation for Dynamic Compositions:

In the realm of graphic design, where dynamic compositions and intricate details are commonplace, the Focus Area Selection tool streamlines the workflow. Designers can efficiently isolate elements for use in collages, layouts, or digital artworks, saving valuable time and ensuring that the selected elements seamlessly integrate into the overall design. The tool’s integration with Smart Objects further aligns with the iterative and non-destructive nature of professional design workflows.

Challenges and Considerations

Image Complexity: Adapting to Varied Visual Scenarios:

While Focus Area Selection excels in many scenarios, its performance can be influenced by the complexity of the image. In instances where there is minimal contrast between the subject and background or in highly detailed scenes, users may need to experiment with refinement options to achieve optimal results. Awareness of the tool’s strengths and considerations in different visual scenarios is key to mastering its application.

Edge Refinement Sensitivity: Balancing Precision and Natural Transitions:

Balancing the sensitivity of edge refinement is crucial when using the Focus Area Selection tool. While it offers powerful options for refining edges, designers must strike a balance to avoid over-smoothing or creating unnatural transitions. This requires a nuanced understanding of the specific requirements of each project and a judicious application of refinement controls.

Conclusion: Unmasking a New Era of Selection Precision

As we reflect on the evolution of selection tools in Photoshop, the advent of Focus Area Selection in Photoshop CC 2014 stands out as a landmark moment. The tool unmasked a new era of selection precision, empowering designers and photographers with the ability to tackle intricate subject matter and complex compositions with confidence.

In the hands of creative professionals, Focus Area Selection becomes a gateway to unprecedented creative possibilities. Whether retouching portraits, isolating products, capturing the nuances of nature, or crafting dynamic graphic compositions, the tool’s capabilities align with the diverse needs of the creative community.

As Adobe continues to innovate and refine its suite of creative tools, the legacy of Focus Area Selection in Photoshop CC 2014 endures. It serves as a testament to the ongoing commitment to providing designers and photographers with the tools they need to bring their creative visions to life with unparalleled precision and sophistication. The unmasking of creativity through Focus Area Selection becomes a symbol of the limitless potential that awaits those who dare to explore the intricate intersection of technology and artistic expression.

  • « Go to Previous Page
  • Go to page 1
  • Interim pages omitted …
  • Go to page 66
  • Go to page 67
  • Go to page 68
  • Go to page 69
  • Go to page 70
  • Interim pages omitted …
  • Go to page 77
  • Go to Next Page »

Copyright © 2025 · Genesis Sample Theme on Genesis Framework · WordPress · Log in