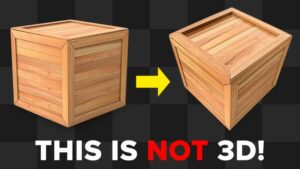
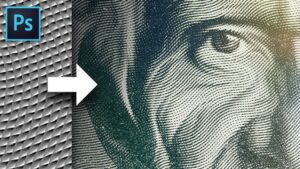
• Skip to primary navigation
  • Skip to main content

OceanofAPK

We Design Website For You

  • Home
  • Search
  • Apps Categories
  • Games Categories

Emily

Unlocking LinkedIn Potential: A Comprehensive Guide on Copying and Sharing Profile URL

January 27, 2024 by Emily

LinkedIn, as the premier professional networking platform, empowers individuals to connect, collaborate, and showcase their professional journeys. Knowing how to copy and share your LinkedIn profile URL is a crucial skill for effective networking, job hunting, and personal branding. In this extensive guide, we will explore the intricacies of copying and sharing LinkedIn profile URLs, providing comprehensive insights into the various methods and considerations for optimal utilization.

Understanding the Significance of LinkedIn Profile URLs:

1. Professional Branding:

  • Digital Identity:
    • Your LinkedIn profile serves as a digital representation of your professional identity. Sharing your LinkedIn profile URL allows you to showcase your skills, experiences, and achievements to colleagues, potential employers, and collaborators.

2. Networking Opportunities:

  • Seamless Connection:
    • Sharing your LinkedIn profile URL is an efficient way to connect with professionals in your industry. It provides a direct and seamless path for others to learn more about your background and expertise.

How to Copy LinkedIn Profile URL:

1. Web Browser Method:

  • Desktop Instructions:
    • Log in to your LinkedIn account via a web browser. Navigate to your profile by clicking on your profile picture or your name. In the URL address bar, you will find your LinkedIn profile URL. You can either manually copy it or right-click on the URL and select “Copy.”

2. LinkedIn Mobile App Method:

  • iOS and Android Instructions:
    • If you’re using the LinkedIn mobile app, open the app and go to your profile by tapping on your profile picture. Below your profile picture and headline, you’ll find the “Share” button. Tap on it, and you’ll see the option to “Copy Link to Profile.”

How to Share LinkedIn Profile URL:

1. Direct Messages:

  • Personalized Outreach:
    • Utilize LinkedIn’s messaging feature to share your profile URL directly with connections or potential contacts. This method allows for personalized communication and fosters professional relationships.

2. InMail:

  • Premium Messaging:
    • If you have a LinkedIn Premium subscription, you can use InMail credits to send direct messages to individuals outside your network. Include your profile URL in these messages to provide recipients with easy access to your professional information.

3. Email Signatures:

  • Professional Correspondence:
    • Enhance your email signature by including your LinkedIn profile URL. This is particularly beneficial for professional correspondence, job applications, or any situation where you want to highlight your online professional presence.

4. Business Cards and Marketing Collateral:

  • Offline Networking:
    • If you engage in offline networking or attend professional events, consider adding your LinkedIn profile URL to your business cards and marketing collateral. This creates a bridge between your physical and digital professional presence.

Privacy Considerations:

1. Profile Visibility Settings:

  • Public vs. Private Profiles:
    • Adjust your LinkedIn profile visibility settings based on your preferences. A public profile allows anyone on the internet to view your full profile, while a private profile restricts access to your connections only.

2. Customizing Public Profile URL:

  • Personalized URL:
    • LinkedIn provides the option to customize your public profile URL. In your profile settings, under “Edit public profile & URL,” you can create a personalized URL that reflects your name or professional brand. This customized URL can be more memorable and shareable.

Proactive Tips for Profile URL Optimization:

1. Regular Profile Updates:

  • Dynamic Representation:
    • Keep your LinkedIn profile updated with the latest information about your professional journey. Regular updates ensure that your profile URL leads to accurate and relevant content.

2. Utilizing LinkedIn Features:

  • Media Attachments and Recommendations:
    • Enhance your LinkedIn profile by utilizing features like media attachments (photos, presentations) and recommendations. These elements add depth to your profile and provide additional context for those visiting your LinkedIn page through the shared URL.

3. Incorporating Keywords:

  • Search Optimization:
    • Consider incorporating relevant keywords into your LinkedIn profile, especially in your headline and summary. This optimization enhances the discoverability of your profile when users search for professionals with specific skills or experiences.

Troubleshooting Profile URL Issues:

1. Broken Links:

  • Link Verification:
    • Periodically check the functionality of your LinkedIn profile URL to ensure it directs users to the intended destination. Broken links can negatively impact your professional image and networking efforts.

2. Custom URL Availability:

  • Unique Identifiers:
    • When customizing your LinkedIn public profile URL, ensure that the chosen identifier (usually your name) is available. LinkedIn may prompt you to try different variations if your preferred URL is already in use.

Conclusion:

Mastering the art of copying and sharing your LinkedIn profile URL is an essential component of effective professional networking and personal branding. By following the steps outlined in this comprehensive guide, you’ll navigate the intricacies of LinkedIn profile URL management with ease.

As you share your LinkedIn profile URL with connections, potential employers, and collaborators, remember that your online professional presence is a dynamic representation of your skills and experiences. Regularly updating your profile, customizing your URL, and leveraging LinkedIn features contribute to a compelling and impactful online professional identity. Happy networking!

Mastering Instagram: A Comprehensive Guide on Copying and Sharing Profile Links

January 27, 2024 by Emily

Instagram, with its visually rich and dynamic platform, has become a cornerstone of social media engagement. Whether you’re connecting with friends, promoting your brand, or exploring the vibrant world of influencers, knowing how to copy and share an Instagram profile link is a fundamental skill. In this extensive guide, we will unravel the intricacies of sharing Instagram profile links, exploring the various methods and settings available to users.

Understanding the Importance of Profile Links:

1. Directing Traffic:

  • Centralized Information Hub:
    • Your Instagram profile serves as a centralized hub for your content, providing an overview of your posts, bio, and other essential details. Sharing your profile link allows others to navigate directly to your profile, making it a valuable tool for directing traffic and building your online presence.

2. Cross-Promotion:

  • Multi-Platform Engagement:
    • Profile links are instrumental in cross-platform promotion. Whether you’re running a business, managing a personal brand, or promoting an event, sharing your Instagram profile link across various channels enhances visibility and encourages engagement from diverse audiences.

How to Copy Instagram Profile Link:

1. Mobile App Method:

  • iOS and Android Instructions:
    • On the Instagram mobile app, navigate to your profile by tapping on your profile picture at the bottom right. Once on your profile, tap the three horizontal lines in the top right corner to open the menu. From the menu, select “Copy Profile URL” or “Copy Profile Link” to copy your profile link to the clipboard.

2. Web Browser Method:

  • Desktop Instructions:
    • If you’re accessing Instagram via a web browser, go to instagram.com and log in. Navigate to your profile by clicking on your profile picture. Once on your profile, the URL in the address bar is your profile link. You can manually copy it or right-click on the URL and choose the “Copy” option.

How to Share Instagram Profile Link:

1. Direct Messages:

  • Personalized Outreach:
    • One of the most straightforward ways to share your Instagram profile link is through direct messages. Whether you’re connecting with friends, clients, or collaborators, sending your profile link in a direct message allows for personalized communication.

2. Social Media Platforms:

  • Cross-Platform Visibility:
    • Leverage other social media platforms to share your Instagram profile link. Platforms like Twitter, Facebook, or LinkedIn provide spaces in your bio or profile where you can include your Instagram link. This cross-platform approach enhances your online presence and encourages a diverse audience to connect with you.

3. Email Signatures:

  • Professional Networking:
    • For professional networking or business purposes, consider adding your Instagram profile link to your email signature. This subtle but effective method ensures that your Instagram presence is visible to contacts in your professional communications.

4. QR Codes:

  • Tech-Savvy Engagement:
    • Instagram allows you to generate a QR code for your profile. This feature is particularly useful for in-person events or printed materials. Anyone with a QR code scanner can quickly access your Instagram profile by scanning the code.

Privacy Considerations:

1. Account Privacy Settings:

  • Public vs. Private Profiles:
    • Your ability to share your Instagram profile link may be affected by your account’s privacy settings. If your account is set to private, only approved followers can view your posts and access your profile link. Public accounts, on the other hand, allow anyone to view and share the profile link.

2. Customizing Privacy:

  • Balancing Visibility:
    • If you have a public account but wish to limit certain information, customize your privacy settings. Instagram allows you to control who can comment on your posts, send you direct messages, and more. This balance ensures you have control over your online interactions.

Proactive Tips for Profile Link Optimization:

1. Shortening URLs:

  • Enhancing Aesthetics:
    • Long URLs can be cumbersome, especially in contexts with character limits. Consider using a URL shortening service to create a more visually appealing and user-friendly link when sharing your Instagram profile.

2. Updating Bio Regularly:

  • Dynamic Representation:
    • Your Instagram bio is a dynamic space where you can share information, links, or promotions. Regularly update your bio to keep it current and relevant to your audience. If you have a specific link you want to highlight, such as a recent blog post or product launch, include it in your bio.

3. Utilizing Link in Bio Services:

  • Expanded Link Options:
    • Instagram’s Link in Bio feature allows users to include multiple links in a single location. Various third-party services provide this functionality, giving you the ability to share a broader range of content directly from your Instagram profile.

Troubleshooting Profile Link Issues:

1. Broken Links:

  • Link Verification:
    • Periodically check the functionality of your Instagram profile link to ensure it directs users to the intended destination. Broken links can negatively impact user experience and thwart your promotional efforts.

2. Updating External Links:

  • Timely Adjustments:
    • If your Instagram profile includes external links, such as those in your bio or posts, ensure they are up to date. Regularly review and update these links to reflect changes in your content, promotions, or other time-sensitive information.

Conclusion:

Mastering the art of copying and sharing your Instagram profile link is a fundamental aspect of maximizing your impact on the platform. Whether you’re fostering personal connections, promoting your brand, or engaging in professional networking, the ability to efficiently share your profile link enhances your visibility and accessibility.

By following the steps outlined in this comprehensive guide, you’ll navigate the intricacies of Instagram profile link management with ease. Remember to leverage various platforms, customize privacy settings, and stay proactive in optimizing your profile link for a dynamic and engaging Instagram presence. Happy sharing!

Navigating the Web: A Comprehensive Guide on How to Turn Off Ad Blocker in Chrome

January 27, 2024 by Emily

Online browsing has become an integral part of our daily lives, and while advertisements play a role in supporting free content on the internet, users often turn to ad blockers for a more streamlined experience. If you find yourself wanting to support websites or encounter issues with certain content due to ad blockers, this extensive guide will walk you through the process of turning off the ad blocker specifically in Google Chrome.

Understanding Ad Blockers:

1. Why Use Ad Blockers?

  • Enhanced User Experience:
    • Ad blockers are browser extensions or software that prevent the display of online advertisements. Users opt for ad blockers to enjoy a cleaner and faster browsing experience, reducing visual clutter and potential distractions.

2. Impact on Websites:

  • Revenue and Content Support:
    • While ad blockers cater to user preferences, they can negatively impact websites that rely on advertising revenue to sustain free content. Many websites depend on ad revenue to provide users with valuable information, entertainment, and services.

How to Turn Off Ad Blocker in Chrome:

1. Disabling Extensions:

  • Chrome Extension Management:
    • Most ad blockers are Chrome extensions. To turn off an ad blocker, click on the three vertical dots in the top right corner of Chrome to open the menu. Navigate to “More tools” and select “Extensions.” Here, you’ll find a list of installed extensions, including ad blockers.

2. Locating the Ad Blocker Extension:

  • Identifying the Extension:
    • In the Extensions menu, locate your ad blocker. Common ad blockers include AdBlock, uBlock Origin, and AdBlock Plus. Each extension has its own settings and options, so it’s essential to identify the specific ad blocker you’re using.

3. Disabling or Removing the Extension:

  • Toggle Off or Remove:
    • To turn off the ad blocker temporarily, toggle the switch next to the extension to the “Off” position. If you wish to remove the extension entirely, click on “Remove” or the trash bin icon. Keep in mind that removing the extension will disable the ad blocker for good.

4. Configuring Extension Settings:

  • Advanced Options:
    • Some ad blockers allow you to customize their behavior through settings. If you want a more nuanced approach, explore the extension’s settings. This may include whitelisting specific websites or adjusting filters to permit certain types of non-intrusive ads.

Troubleshooting and Additional Considerations:

1. Chrome’s Built-In Ad Blocker:

  • Built-In Protections:
    • Google Chrome itself has a built-in ad blocker designed to filter out intrusive ads that don’t adhere to the Better Ads Standards. This feature is automatically enabled, and users usually don’t need to take any action to activate or deactivate it.

2. Whitelisting Websites:

  • Supporting Preferred Sites:
    • If you appreciate the content of a particular website and want to support it by allowing non-intrusive ads, consider whitelisting that site in your ad blocker settings. This enables ads on the whitelisted site while keeping the ad blocker active elsewhere.

3. Ad Blocker Exceptions:

  • Allowing Non-Intrusive Ads:
    • Some ad blockers provide the option to allow “acceptable” or “non-intrusive” ads. Check the extension settings for options related to allowing certain types of advertisements that adhere to acceptable standards.

Proactive Measures for a Balanced Web Experience:

1. Supporting Content Creators:

  • Acknowledging the Value:
    • Consider the value websites provide through their content. If a site offers valuable information, entertainment, or services for free, supporting it by allowing non-intrusive ads ensures the sustainability of such platforms.

2. Exploring Alternatives:

  • Adaptive Browsing:
    • Instead of turning off ad blockers globally, explore browser settings or extensions that offer adaptive solutions. Some tools allow you to control ad blocking on a per-site basis, providing a middle ground between a completely ad-free experience and supporting content creators.

3. Educating on Ad Choices:

  • User Awareness:
    • Educate yourself on the types of ads that contribute positively to the web ecosystem. Advertisements are a crucial part of the online economy, and choosing to engage with non-intrusive, relevant ads supports a healthy digital landscape.

Conclusion:

The decision to turn off an ad blocker in Chrome is a nuanced one, balancing the desire for an uncluttered browsing experience with the recognition of the value ads bring to content creators. By following the steps outlined in this comprehensive guide, you can seamlessly manage your ad blocker settings in Chrome, whether you choose to disable it temporarily, configure advanced options, or explore adaptive alternatives.

As the digital landscape continues to evolve, users play a crucial role in shaping the future of online content and advertising. Whether you opt for a selective approach to ad blocking or choose to support content creators through whitelisting and allowing non-intrusive ads, your decisions contribute to a more balanced and sustainable web experience for everyone.

Demystifying Gmail Archives: A Comprehensive Guide on Checking Archived Mails

January 27, 2024 by Emily

Gmail, Google’s widely used email platform, provides users with a plethora of features to manage and organize their emails effectively. Among these features is the “Archive” function, which allows users to declutter their inbox without permanently deleting emails. In this extensive guide, we will unravel the intricacies of checking archived mails in Gmail, exploring the various methods and settings that empower users to access their archived messages.

Understanding Gmail Archives:

1. What is Archiving?

  • Organized Inbox Management:
    • Archiving in Gmail is a feature designed to streamline email management. When you archive an email, it is removed from your inbox but not permanently deleted. Instead, the archived email is moved to the “All Mail” folder, making it accessible whenever you need to reference or retrieve it.

2. Why Archive?

  • Efficient Inbox Maintenance:
    • Archiving is particularly useful for users who want to keep their inbox clutter-free without losing important emails. It’s an alternative to deleting messages, offering a method to organize and prioritize without the risk of irreversible data loss.

Checking Archived Mails:

1. Utilizing the Search Bar:

  • Efficient Search Queries:
    • The simplest way to check archived emails is by using the search bar. In the search bar, you can enter specific keywords, sender names, or any other identifying information related to the archived email. Gmail’s powerful search functionality will retrieve the relevant archived messages.

2. Navigating to the “All Mail” Label:

  • Comprehensive Email Repository:
    • Gmail automatically archives emails when you click the “Archive” button or use the keyboard shortcut “E.” To access your archived emails, navigate to the “All Mail” label in the left sidebar. This label houses all your emails, including those that have been archived.

3. Using the “More” Dropdown Menu:

  • Hidden Treasures:
    • In the left sidebar, find the “More” dropdown menu. Clicking on it reveals additional labels, including “All Mail.” By selecting “All Mail,” you can view a comprehensive list of all your emails, both archived and unarchived.

4. Checking via Mobile App:

  • Mobile Accessibility:
    • If you use the Gmail mobile app, checking archived emails is just as straightforward. Open the app, tap on the three horizontal lines to access the menu, and scroll down to find the “All Mail” label. Tapping on it will display all your emails, including archived ones.

Pro Tips for Efficient Email Management:

1. Archiving vs. Deleting:

  • Strategic Decision-Making:
    • Understand the distinction between archiving and deleting. Archiving is a way to organize emails without permanently removing them. Consider archiving emails you may need for future reference, while deleting is a more permanent action suited for emails you no longer need.

2. Creating Custom Labels:

  • Personalized Organization:
    • Enhance your email organization by creating custom labels. You can label emails based on projects, categories, or priorities. Custom labels provide an additional layer of organization beyond the default “Inbox” and “All Mail” categories.

3. Utilizing Filters:

  • Automated Sorting:
    • Gmail’s filters allow you to automate the organization of your emails. Create filters based on criteria like sender, subject, or keywords. When emails meet the specified criteria, they can be automatically archived, labeled, or moved to designated folders.

Troubleshooting and Advanced Techniques:

1. Checking in “Trash” or “Spam”:

  • Accidental Deletions:
    • If an email is not in your inbox or “All Mail,” check the “Trash” or “Spam” folders. Emails deleted or marked as spam may bypass archiving and end up in these folders.

2. Undoing Archiving:

  • Immediate Retrieval:
    • Immediately after archiving an email, you can use the “Undo” option that appears at the bottom of the screen. This allows you to quickly return the email to your inbox without navigating to the “All Mail” folder.

3. Advanced Search Operators:

  • Refined Search Queries:
    • Refine your search using advanced search operators. For example, you can use “label:inbox” to search for emails in the inbox or “label:all” to find all emails, including archived ones.

Conclusion:

Navigating the archives in Gmail is a skill that empowers users to maintain an organized and efficient email management system. By understanding the purpose of archiving, utilizing search functionalities, and incorporating advanced techniques, you can seamlessly check and retrieve archived emails whenever needed.

Gmail’s flexibility and user-friendly interface make it conducive to effective email organization. Whether you’re on a desktop or mobile device, exploring the archives and finding specific emails becomes a streamlined process. As you master the art of checking archived mails, you’ll transform your Gmail experience into a well-orchestrated symphony of productivity and organization. Happy archiving!

Decoding TikTok: A Comprehensive Guide on Finding Recently Watched Videos

January 27, 2024 by Emily

TikTok has taken the world by storm, captivating users with its short-form videos that span a myriad of genres. As you scroll through the endless stream of content, you may find yourself wondering how to keep track of the videos you’ve recently watched. In this extensive guide, we’ll unravel the mystery of finding recently watched TikTok videos, exploring the app’s features and settings that allow you to revisit your favorite moments.

Navigating Your TikTok Experience:

1. The For You Page (FYP):

  • Dynamic Content Feed:
    • TikTok’s For You Page is the heart of your exploration on the platform. It curates a personalized feed based on your preferences, serving you a diverse range of content. As you scroll through videos, the algorithm refines its recommendations, making it a dynamic and ever-evolving experience.

2. Liking and Sharing:

  • Interactive Engagement:
    • While scrolling, you can express your appreciation for videos by tapping the heart icon to “like” them. Additionally, you can share videos with others or save them to your device. These interactive features play a role in organizing your engagement history.

3. Following Creators:

  • Building a Feed:
    • Following creators whose content resonates with you contributes to the diversity of your feed. As you follow more accounts, TikTok tailors your For You Page to align with your evolving interests, ensuring a personalized and engaging content discovery journey.

Exploring Recently Watched Videos:

1. Account Activity:

  • User Profile Insights:
    • TikTok provides a feature known as “Account Activity” that gives you insights into your engagement history. To access this, go to your profile, tap on the three dots (ellipsis) in the top right corner, and select “Privacy and Settings.” Under “Account,” you’ll find “View Account Activity.”

2. Recently Watched Videos:

  • Tracing Your Steps:
    • Within the “Account Activity” section, you can find a list of recently watched videos. This feature serves as a journey through your TikTok exploration, allowing you to retrace your steps and rediscover content that caught your attention.

Saving and Organizing Content:

1. Save to Favorites:

  • Building a Collection:
    • TikTok enables you to save videos to your Favorites for easy access. When you encounter a video you want to revisit later, tap the bookmark icon (it looks like a ribbon) on the right side of the screen. You can find your saved videos in the Favorites tab on your profile.

2. Private List:

  • Curate Your Library:
    • If you prefer a more private approach to organizing your favorite content, TikTok allows you to create a private list. Tap the bookmark icon, select “Private,” and add the video to a custom list visible only to you.

Leveraging the Search Function:

1. Discovering Specific Content:

  • Search Bar Exploration:
    • If you’re looking for a specific video or creator, TikTok’s search bar is your ally. You can use keywords, hashtags, or usernames to narrow down your search and locate videos you’ve engaged with recently.

2. Browsing Hashtags:

  • Thematic Exploration:
    • Dive into the world of TikTok by exploring hashtags related to your interests. By clicking on a hashtag, you can revisit videos associated with that theme, offering a convenient way to find and enjoy content you’ve engaged with before.

Pro Tips for TikTok Mastery:

1. Clearing Cache:

  • Optimizing App Performance:
    • TikTok, like any app, stores data to enhance your experience. If you’re facing issues or want to refresh your app, consider clearing the cache. You can do this in the app settings, potentially impacting the visibility of recently watched videos.

2. Regularly Update the App:

  • Accessing New Features:
    • TikTok frequently releases updates with new features and optimizations. By keeping your app up to date, you ensure that you have access to the latest tools for navigating and exploring content.

Conclusion:

Mastering the art of finding recently watched TikTok videos involves a blend of exploring the platform’s features, utilizing settings, and leveraging your interactive engagement. Whether you’re revisiting videos for sheer enjoyment, seeking inspiration, or looking to connect with creators, TikTok’s dynamic ecosystem caters to your preferences.

As you embark on your TikTok journey, remember that the app’s algorithm continually refines your For You Page, ensuring that your content discovery is a personalized and evolving experience. By delving into your account activity, saving favorites, and utilizing the search function, you’ll not only navigate the app efficiently but also uncover a treasure trove of captivating content that resonates with your unique tastes. Happy TikTok-ing!

Crafting Your Digital Marketplace: A Comprehensive Step-by-Step Tutorial on Creating an Online Store for Freelancers

January 26, 2024 by Emily

Introduction:

In the digital era, freelancers are increasingly seeking opportunities to establish their online presence and showcase their skills through personalized online stores. Creating an online store not only provides freelancers with a platform to market their services but also allows them to reach a global audience. This comprehensive step-by-step tutorial is designed to guide freelancers through the process of creating an online store, covering everything from choosing a platform to optimizing product listings and fostering customer engagement.

Section 1: Defining Your Niche and Services

1.1 Identifying Your Niche: Before diving into the creation of an online store, freelancers should identify their niche and target audience. This section guides freelancers through the process of defining their specialized skills, understanding their unique value proposition, and identifying the services they want to offer through their online store.

1.2 Researching Market Demand: Conducting market research is crucial for understanding the demand for your services. Explore techniques for researching market trends, identifying competitors, and uncovering opportunities within your chosen niche. This step ensures that your online store aligns with market demand and consumer preferences.

Section 2: Choosing the Right E-commerce Platform

2.1 Exploring E-commerce Platforms: There are numerous e-commerce platforms available, each with its own features and benefits. This section provides an overview of popular platforms such as Shopify, WooCommerce, and BigCommerce. Compare the strengths and weaknesses of each to make an informed decision based on your specific needs and preferences.

2.2 Evaluating Platform Features: Assess the features offered by different e-commerce platforms, including customization options, payment gateways, and scalability. Understand how each platform accommodates digital products and services, as well as its capabilities for managing inventory, orders, and customer interactions.

2.3 Choosing a Domain Name: Selecting a domain name is a crucial step in establishing your brand identity. Learn how to choose a domain name that reflects your services, is easy to remember, and aligns with your niche. Explore domain registration options and ensure that your chosen name is available.

Section 3: Setting Up Your Online Store

3.1 Registering on the Chosen Platform: Once you’ve selected an e-commerce platform, the next step is to register and set up your online store. This section provides a step-by-step guide to creating an account, entering basic information, and selecting a subscription plan if applicable.

3.2 Customizing Your Store Design: Personalize your online store to align with your brand and engage visitors. Explore customization options such as themes, color schemes, and fonts. Learn how to create a visually appealing and user-friendly storefront that effectively showcases your freelancing services.

3.3 Configuring Payment Gateways: Setting up secure and convenient payment options is crucial for an online store. Understand the process of configuring payment gateways on your chosen platform, including options like PayPal, Stripe, and credit card payments. Ensure that your customers can make seamless transactions.

Section 4: Listing Your Freelancing Services

4.1 Creating Product Listings: Freelancers offer services rather than physical products, so adapting your online store for digital services is essential. This section guides you through creating compelling product listings that clearly outline your freelancing services. Include detailed descriptions, pricing, and any relevant options or packages.

4.2 Showcasing Portfolios and Work Samples: Enhance your product listings by showcasing portfolios and work samples. Explore methods for incorporating visuals, videos, or links to previous projects. Providing tangible evidence of your skills and expertise builds trust with potential clients.

4.3 Setting Pricing and Discounts: Establishing clear and competitive pricing is a key aspect of attracting clients. Learn how to set pricing for your freelancing services, and consider offering introductory discounts or bundled packages to incentivize purchases. Balance your rates with the perceived value of your services.

Section 5: Implementing Digital Downloads and Deliverables

5.1 Configuring Digital Product Delivery: For freelancers offering digital services, configuring the delivery of digital downloads is essential. Understand how to set up automated delivery systems or provide access to downloadable files upon purchase. Ensure a seamless experience for your clients when receiving their deliverables.

5.2 Providing Secure Access to Services: Security is paramount when delivering digital services. Explore strategies for providing secure access to services, such as password-protected files or exclusive client portals. Assure your clients that their information and deliverables are handled with the utmost confidentiality.

Section 6: Optimizing for Search Engines

6.1 Implementing SEO Best Practices: To attract organic traffic to your online store, optimizing for search engines is crucial. Learn about SEO best practices, including keyword research, meta tags, and content optimization. Implement strategies that enhance your store’s visibility on search engine results pages (SERPs).

6.2 Leveraging Blogging and Content Marketing: Blogging and content marketing are powerful tools for driving traffic and establishing authority in your niche. Explore how to integrate a blog into your online store, create valuable content related to your freelancing services, and engage your audience through informative articles and updates.

Section 7: Fostering Customer Engagement

7.1 Implementing Live Chat and Support: Providing excellent customer support is essential for client satisfaction. Explore the implementation of live chat options, contact forms, and support channels within your online store. Be responsive to inquiries and offer assistance to potential clients navigating your services.

7.2 Collecting and Showcasing Reviews: Client testimonials and reviews are valuable social proof that can influence purchasing decisions. Encourage satisfied clients to leave reviews and showcase them prominently on your online store. Learn how to leverage positive feedback to build trust and credibility.

Section 8: Marketing Your Online Store

8.1 Utilizing Social Media: Social media is a powerful marketing tool for freelancers. Explore strategies for leveraging platforms such as Instagram, Facebook, LinkedIn, and Twitter to promote your online store. Create engaging content, share updates, and interact with your audience to increase brand awareness.

8.2 Email Marketing Campaigns: Build a loyal customer base by implementing email marketing campaigns. Learn how to collect customer emails, create targeted campaigns, and nurture leads. Use email marketing to announce promotions, share updates, and maintain ongoing communication with your audience.

Section 9: Managing Orders and Analytics

9.1 Order Management: Efficient order management is crucial for a smooth operation. Understand how to manage incoming orders, process payments, and fulfill digital services promptly. Utilize order management tools provided by your e-commerce platform to streamline the process.

9.2 Analyzing Store Performance: Regularly analyze the performance of your online store using analytics tools. Explore key metrics such as website traffic, conversion rates, and customer behavior. Use these insights to make informed decisions, optimize your store, and identify areas for improvement.

Section 10: Scaling Your Freelancing Business

10.1 Expanding Service Offerings: As your online store gains traction, consider expanding your service offerings. Explore complementary services within your niche or diversify into related areas. Assess market demand and ensure that new offerings align with your skills and expertise.

10.2 Collaborations and Partnerships: Collaborations and partnerships can amplify your online store’s reach. Explore opportunities to collaborate with other freelancers or businesses in your niche. Consider joint ventures, affiliate partnerships, or guest collaborations to expand your network and client base.

Conclusion:

Creating an online store for freelancers is a transformative journey that opens doors to a global audience and countless opportunities. This comprehensive step-by-step tutorial has equipped you with the knowledge and strategies needed to navigate the process effectively—from defining your niche to optimizing your online store for success. As you embark on this exciting endeavor, remember that continuous learning, adaptability, and a customer-centric approach are key to building a thriving online presence. May your online store become a hub for your freelancing services, connecting you with clients around the world and propelling your freelance career to new heights. Here’s to the success of your digital marketplace!

Navigating Fiverr’s Freelance Wonderland: A Comprehensive Guide to Tips and Tricks for Beginners

January 26, 2024 by Emily

Introduction:

In the ever-expanding landscape of online freelancing, Fiverr stands out as a vibrant marketplace that connects freelancers with clients seeking a wide array of services. Whether you’re a graphic designer, writer, programmer, or any other creative professional, Fiverr provides a platform to showcase your skills and build a thriving freelance career. This comprehensive guide is designed to empower beginners with valuable tips and tricks to navigate Fiverr effectively, from creating an appealing profile to optimizing gig performance and fostering client relationships.

Section 1: Setting Up Your Fiverr Profile

1.1 Crafting a Compelling Bio: Your Fiverr profile is your virtual storefront, and a well-crafted bio is your opportunity to make a memorable first impression. Learn how to succinctly showcase your skills, experience, and what makes you unique. Highlight your expertise and convey your passion for the services you offer.

1.2 Selecting a Professional Profile Picture: The importance of a professional profile picture cannot be overstated. This section provides insights into choosing a clear, high-quality image that reflects your professionalism and approachability. Consider the visual impact of your profile picture on potential clients.

1.3 Showcasing Portfolio Samples: Fiverr allows you to showcase your skills through portfolio samples. Discover how to curate a portfolio that effectively demonstrates the breadth and depth of your capabilities. Include diverse examples of your work to appeal to a broader range of clients.

1.4 Utilizing Keywords for Visibility: Keywords play a crucial role in Fiverr’s search algorithm. Learn how to strategically incorporate relevant keywords in your profile to enhance discoverability. Identify the terms potential clients are likely to use when searching for services similar to yours.

Section 2: Creating Your First Gig

2.1 Understanding Gig Titles and Descriptions: Crafting compelling gig titles and descriptions is key to attracting clients. This section provides tips on creating titles that grab attention and descriptions that clearly outline what clients can expect. Strike a balance between creativity and clarity to entice potential buyers.

2.2 Pricing Strategies: Establishing the right pricing strategy is crucial for attracting clients while ensuring your services are appropriately valued. Explore different pricing models on Fiverr, such as package pricing and add-on services. Find the sweet spot that aligns with your skills and market demand.

2.3 Offering Packages for Variety: Fiverr allows freelancers to offer services in packages, providing clients with options based on their needs and budget. Understand how to structure your packages effectively, offering a range of services that cater to diverse client preferences.

2.4 Gig Extras for Additional Revenue: Gig extras are a powerful tool for increasing your earnings on Fiverr. This section explores how to strategically incorporate gig extras to provide additional value to clients and boost your overall revenue. Identify opportunities to upsell without overwhelming potential buyers.

Section 3: Enhancing Gig Visuals

3.1 High-Quality Images and Videos: Visual appeal is paramount on Fiverr. Discover the importance of high-quality images and, when applicable, videos to showcase your work. Learn how to capture attention through visuals that effectively communicate the quality and uniqueness of your services.

3.2 Creating Custom Thumbnails: Thumbnails are the first visual element potential clients see when browsing Fiverr. This section delves into the art of creating custom thumbnails that stand out and accurately represent your gig. Understand the visual elements that make thumbnails compelling and clickable.

3.3 Incorporating Branding Elements: Consistent branding reinforces your identity on Fiverr. Explore the integration of branding elements in your gig visuals, including colors, fonts, and logos. This not only enhances visual appeal but also contributes to brand recognition and trust.

Section 4: Leveraging Fiverr Tools

4.1 Fiverr Analytics for Insights: Fiverr provides valuable analytics to help you understand your gig’s performance. Learn how to interpret analytics data, including impressions, clicks, and conversion rates. Use these insights to refine your gigs, identify areas for improvement, and make data-driven decisions.

4.2 Buyer Requests for New Opportunities: The Buyer Requests section is a goldmine for discovering new opportunities. Understand how to navigate and respond to buyer requests effectively. Craft personalized responses that showcase your expertise and demonstrate your understanding of the client’s needs.

4.3 Fiverr Promoted Gigs for Visibility: Fiverr Promoted Gigs is a paid advertising feature that can increase your gig’s visibility. Explore how to set up and optimize Promoted Gigs campaigns to reach a broader audience. Understand the budgeting and bidding process to maximize the impact of this feature.

Section 5: Delivering Exceptional Service

5.1 Clear Communication: Communication is the cornerstone of successful freelancing on Fiverr. Learn how to maintain clear and professional communication with clients. Set expectations, respond promptly, and address any queries or concerns to foster a positive client experience.

5.2 Meeting Deadlines: Timely delivery is a crucial aspect of client satisfaction. Explore strategies for managing your workload, setting realistic deadlines, and consistently meeting or exceeding client expectations. Understand the impact of on-time delivery on your Fiverr seller rating.

5.3 Revisions and Client Feedback: Revisions are part of the freelancing process. Understand how to handle revision requests professionally and ensure client satisfaction. Learn the importance of client feedback and how positive reviews contribute to building a strong reputation on Fiverr.

Section 6: Building Client Relationships

6.1 Building Trust and Long-Term Relationships: Building trust is essential for long-term success on Fiverr. Explore strategies for fostering trust through transparent communication, reliable delivery, and exceptional service. Learn how to go above and beyond to exceed client expectations and build lasting relationships.

6.2 Offering Discounts and Incentives: Offering discounts and incentives can be a powerful strategy to attract new clients and retain existing ones. This section provides insights into when and how to offer discounts strategically. Understand the psychology behind discounts and how they can contribute to client loyalty.

Section 7: Managing Finances and Growth

7.1 Financial Planning for Freelancers: Freelancing on Fiverr involves managing your finances effectively. Explore tips for financial planning, setting rates, and budgeting for taxes. Understand the financial aspects of freelancing, including invoicing, payment methods, and withdrawing earnings.

7.2 Scaling Your Fiverr Business: As you gain experience and build a positive reputation on Fiverr, consider strategies for scaling your freelance business. Explore avenues for expanding your service offerings, increasing your rates, and attracting higher-tier clients. Understand the importance of continuous improvement and adapting to market trends.

Section 8: Handling Challenges and Staying Motivated

8.1 Addressing Negative Reviews: Negative reviews are an inevitable part of freelancing. Learn how to handle negative reviews professionally and use them as opportunities for growth. Explore strategies for resolving issues, addressing client concerns, and maintaining a positive outlook.

8.2 Staying Motivated as a Freelancer: Freelancing can be a rollercoaster of highs and lows. This section provides insights into staying motivated and overcoming challenges. Discover strategies for maintaining a healthy work-life balance, setting realistic goals, and celebrating achievements to stay inspired on your freelancing journey.

Conclusion:

Embarking on a freelancing journey on Fiverr offers unparalleled opportunities for creative professionals and skilled individuals. This comprehensive guide has equipped you with a wealth of tips and tricks to navigate Fiverr effectively—from setting up your profile to delivering exceptional service and building lasting client relationships. As you embark on your freelancing adventure, remember that continuous learning, adaptability, and a passion for your craft are key ingredients for success. Fiverr is a dynamic platform, and by applying these insights and refining your approach over time, you’ll not only thrive as a freelancer but also contribute to the vibrant community of talents that call Fiverr home. May your Fiverr journey be filled with growth, success, and the fulfillment of your professional aspirations.

  • « Go to Previous Page
  • Go to page 1
  • Interim pages omitted …
  • Go to page 51
  • Go to page 52
  • Go to page 53
  • Go to page 54
  • Go to page 55
  • Interim pages omitted …
  • Go to page 77
  • Go to Next Page »

Copyright © 2025 · Genesis Sample Theme on Genesis Framework · WordPress · Log in