Mastering Stability: A Comprehensive Guide to Stabilizing Footage in Adobe After Effects
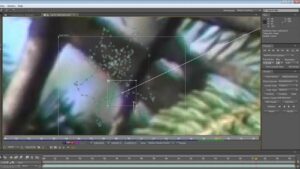
Introduction: Stabilizing footage is a crucial step in video production, especially when dealing with shaky or handheld footage. Adobe After...
Introduction: Stabilizing footage is a crucial step in video production, especially when dealing with shaky or handheld footage. Adobe After...

Introduction: In video production, the synchronization of audio and video clips is crucial for creating a seamless viewing experience. Whether...

Introduction: Voiceovers play a pivotal role in video production, providing narration, commentary, and dialogue that guide viewers through the visual...

Introduction: The soundtrack of a video is often as essential as its visuals. It sets the mood, enhances emotions, and...

Introduction: Mixing audio is an art form that plays a crucial role in creating a captivating and immersive audiovisual experience....
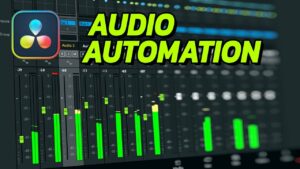
Introduction: Automation is a powerful tool in audio production, allowing editors and engineers to dynamically control various parameters of their...
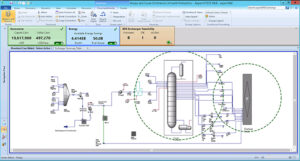
Introduction: Aspen HYSYS is a leading process simulation software used extensively in the chemical, petrochemical, and oil and gas industries...


