Comprehensive Guide: Setting Up a Printer in Windows 7

In the digital age, printers remain indispensable tools for transforming digital documents into tangible copies. Windows 7, Microsoft’s renowned operating system, offers robust features and utilities to seamlessly integrate printers into your computing environment. Whether you’re setting up a local printer connected directly to your computer or configuring a network printer accessible to multiple users, understanding the process of setting up a printer in Windows 7 is essential for harnessing the full potential of your printing capabilities. In this exhaustive guide, we will delve deep into the intricacies of setting up a printer in Windows 7, providing step-by-step instructions, troubleshooting tips, and practical insights to ensure a smooth and hassle-free setup experience.
Understanding Printer Setup in Windows 7:
Before diving into the setup process, let’s first grasp the concept and significance of printer setup in Windows 7:
- Definition: Printer setup involves configuring a printer device to communicate with a computer running Windows 7, enabling users to send print jobs and produce physical copies of documents, images, and other content.
- Integration and Compatibility: Windows 7 offers comprehensive support for a wide range of printers, including inkjet printers, laser printers, multifunction printers (MFPs), and network printers, ensuring seamless integration and compatibility with various hardware devices.
- Setup Options: Depending on the type of printer and connectivity options available, users can choose between setting up a local printer connected via USB or parallel port, configuring a network printer connected to a local network, or installing a wireless printer for wireless printing convenience.
Setting Up a Local Printer in Windows 7:
Now, let’s explore the step-by-step process of setting up a local printer connected directly to your computer:
- Connecting the Printer:
- Power on the printer and connect it to your computer using a USB cable or parallel port, depending on the printer’s connectivity options.
- Windows 7 will automatically detect the newly connected printer and attempt to install the necessary drivers.
- Installing Printer Drivers:
- If Windows 7 does not automatically install the printer drivers, you may need to download and install the drivers from the printer manufacturer’s website.
- Visit the manufacturer’s website, locate the drivers for your printer model and Windows 7, and follow the on-screen instructions to download and install the drivers.
- Adding the Printer:
- Click on the Start button in the taskbar and select “Devices and Printers” from the Start menu.
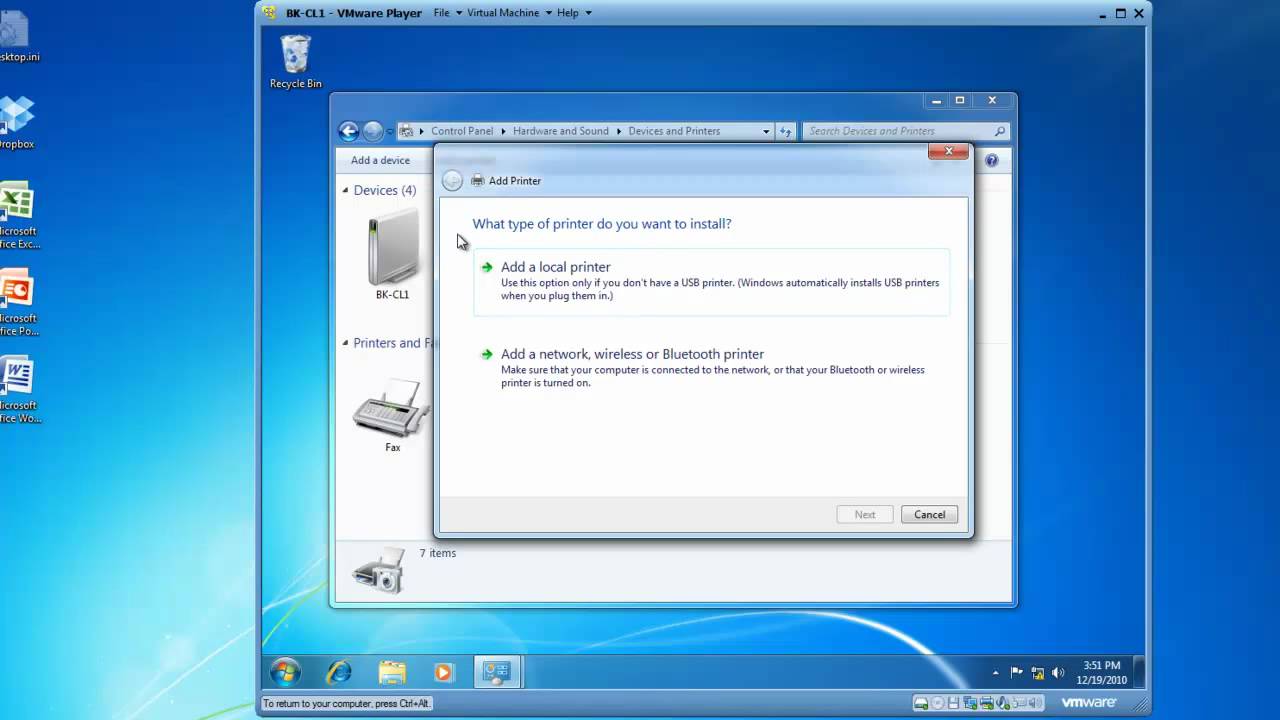
- Click on the “Add a printer” button in the Devices and Printers window.
- Follow the on-screen instructions in the Add Printer Wizard to detect and install the printer.
- Configuring Printer Settings:
- Once the printer is added, right-click on the printer icon and select “Printer properties” from the context menu.
- Customize printer settings such as paper size, orientation, print quality, and default printing preferences to suit your printing needs.
Setting Up a Network Printer in Windows 7:
If you have a printer connected to a local network, setting it up in Windows 7 involves a slightly different process:
- Locating the Printer:
- Ensure that the network printer is connected to the local network and powered on.
- Obtain the printer’s network address or hostname from the printer’s control panel or configuration settings.
- Adding the Network Printer:
- Click on the Start button in the taskbar and select “Devices and Printers” from the Start menu.
- Click on the “Add a printer” button in the Devices and Printers window.
- Select the option to add a network, wireless, or Bluetooth printer.
- Enter the network address or hostname of the printer and follow the on-screen instructions to install the printer.
- Installing Printer Drivers:
- If prompted, download and install the printer drivers for the network printer from the manufacturer’s website or a network share.
- Follow the on-screen instructions to complete the driver installation process.
Advanced Features and Tips:
To further optimize your printing experience in Windows 7, consider the following advanced features and tips:
- Setting Printer Defaults:
- Customize default printer settings, such as duplex printing, grayscale mode, and paper trays, to streamline printing workflows and conserve resources.
- Access printer properties and preferences to configure default settings for all print jobs.
- Managing Print Queues:
- Monitor and manage print queues in the Devices and Printers window to view active print jobs, pause or cancel print jobs, and troubleshoot printing issues.
- Clear print queues and restart the print spooler service if print jobs become stuck or fail to print.
- Configuring Printer Sharing:
- Share local printers with other users on the network to enable collaborative printing and resource sharing.
- Right-click on the printer icon in the Devices and Printers window, select “Printer properties,” navigate to the “Sharing” tab, and enable printer sharing.
- Troubleshooting Printer Issues:
- If you encounter printer issues such as connectivity problems, print quality issues, or driver errors, use Windows 7’s troubleshooting tools to diagnose and resolve the problem.
- Access the “Troubleshoot” option in the printer’s context menu to run the printer troubleshooter and follow the recommended steps to fix the issue.
Conclusion:
Setting up a printer in Windows 7 is a straightforward process that empowers users to harness the full potential of their printing capabilities. By following the comprehensive guide outlined above, users can effectively set up local printers, configure network printers, and optimize printing settings to suit their specific needs and preferences. Whether it’s producing crisp documents, vibrant photos, or professional-quality prints, Windows 7 provides the tools and flexibility to achieve exceptional printing results. So take control of your printing environment today, set up a printer in Windows 7 with confidence, and enjoy seamless printing experiences for all your personal and professional needs.


