3 How to Fix Common Computer Startup Problems Like a Technician
How to Fix Common Computer Startup Problems Like a Technician
When your computer is unable to start up correctly, it may be quite annoying and upsetting, particularly if you have essential work or data stored on it. On the other hand, the majority of issues that arise during the starting process may be resolved by using a cautious and deliberate approach, just as a trained technician would handle them. It is possible to save time, effort, and unneeded repairs by gaining an understanding of the underlying reasons and being aware of what to examine first. The process of detecting and resolving common computer starting issues will be broken down into a series of steps that you will be able to follow with this comprehensive guide.
A Better Understanding of the Characteristics of Startup Issues
In most cases, problems with the computer’s startup arise when the machine is unable to finish the boot procedure. There are a number of potential causes for this, including hardware problems, damaged system files, failed upgrades, and setup mistakes. Identifying the symptoms might be helpful in determining the root of the problem.
When your computer does not turn on at all, it is most likely a problem with the hardware or the power supply. It is possible that there is an issue with the operating system, drivers, or startup setup if it is able to turn on but does not load Windows. When it comes to troubleshooting, paying attention to indications such as beeping noises, flashing lights, or error messages might have the potential to give helpful hints.
Examining the Connections Used for Power and Hardware
Begin with the fundamentals before moving on to the more advanced software solutions. Ensure that your machine is successfully getting electricity. Check to see that the power cord is correctly inserted into the wall socket as well as the power source of the computer. The outlet should be tested by plugging in another device to ensure that it is functioning properly.
In the event that you are using a laptop, check to see that the battery is fully charged, or start the system while the charger is attached. There are occasions when the laptop is unable to switch on because the charger or power adapter is not functioning properly.
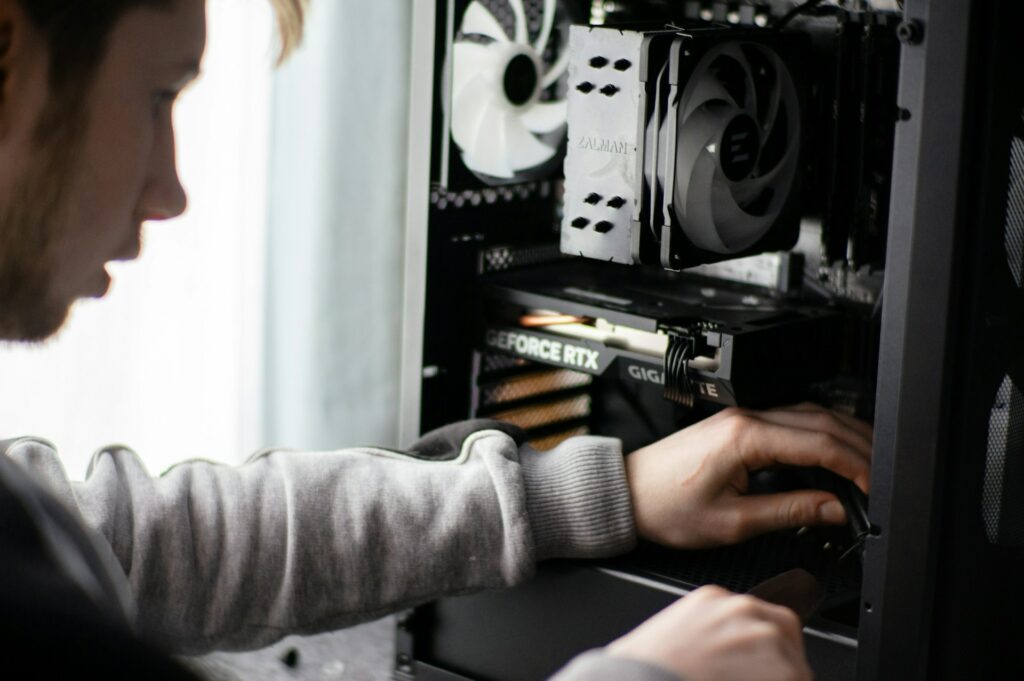
The next step is to examine the internal components, which include the random access memory (RAM), graphics card, and storage drive. There is a possibility that the computer may not start up if they are not placed properly. You should turn off the system, remove the plug from it, open the case, and then carefully reinstall the memory and any other components that can be removed.
Paying Attention to Beep Codes and Red Lights on the Indicator
The majority of computers, particularly desktops, are equipped with diagnostic indications that are built in and may assist in locating issues. Listen for a sequence of beeps coming from the motherboard or watch flickering LED lights on the front panel so you can determine whether or not the computer is attempting to start up.
Various patterns correlate to particular defects, such as a malfunctioning memory, an absence of a graphics card, or issues with the central processing unit. In order to correctly understand these signals, you may consult either the handbook that came with your computer or the website of the manufacturer.
Cutting Off Connections to External Devices
External peripherals, such as USB drives, printers, or external hard disks, have the potential to temporarily disrupt the process of starting up a computer. It is recommended that you disconnect any devices that are not essential and then attempt to restart the computer with just the keyboard, mouse, and monitor attached.
There is a possibility that the problem was caused by one of the external devices or its drivers if the system is able to start properly thereafter. It is necessary to reconnect each device in turn in order to determine which one is the source of the issue.
Getting into the Safe Mode
An attempt should be made to boot into Safe Mode if your machine is able to turn on but Windows does not load correctly. In order to simplify the process of identifying and fixing problems with the system, Safe Mode begins Windows with a reduced collection of drivers and services.
Restarting your computer and pressing the F8 key or holding the Shift key and the F8 key (on earlier systems) before Windows boots will allow you to reach Safe Mode. It is possible to interrupt the starting process three times on Windows 11 by turning off the computer while it is booting up. This will cause the Automatic Repair box to appear. Simply go to the Advanced Options menu, then choose Startup Settings, and finally, enable Safe Mode.
Once you have entered Safe Mode, you will have the ability to remove any recently installed apps, drivers, or updates that may be creating difficulties during the starting process. You may also securely perform scans using antivirus software or utilities that fix your machine.
Making use of Startup Repair
Windows comes with a built-in tool known as Startup Repair that has the capability to automatically correct typical problems that are associated with booting. In the event that your computer fails to boot into the system on several occasions, it will often enter the Automatic Repair environment automatically.
In the event that it does not, you should start the computer, attach a USB stick that is capable of booting Windows, and then choose Repair your machine from the setup screen. Choose Troubleshoot > Advanced Options > Startup Repair from the menu that appears.
The utility will search your computer for startup files that are either missing or damaged, and it will make an effort to repair them. If everything goes according to plan, Windows will resume properly after that.
Performing a Boot Order Check in the BIOS or UEFI
In certain cases, the system can be unable to locate the appropriate boot disk because the boot order was not properly configured. By restarting your computer and pressing the key to access the BIOS or UEFI settings, which is often F2, DEL, or ESC depending on the manufacturer, you will be able to resolve this issue.
Once you have entered, look for the area labeled “Boot Order” or “Boot Priority.” Check to ensure that the primary hard disk or solid-state drive (SSD) that contains Windows is displayed first. Proceed to depart and save your changes. It is now expected that your system will start up correctly, even if the boot sequence was wrong.
Implementing a fix for the Master Boot Record (MBR)
There is a possibility that Windows will not load if the Master Boot Record is inaccurate. The process of repairing it involves booting your computer from a USB device that has a Windows installation, selecting Repair your machine, and then selecting Command Prompt from the Advanced Options menu.
In the window that displays the command prompt, enter the following commands in order, and then hit the Enter key after each one:
all of the following commands: bootrec /fixmbr bootrec /fixboot bootrec /scanos bootrec /rebuildbcd
The window should be closed and your computer should be restarted after these instructions have been completed. It is possible that the key boot files have been destroyed, and this operation will recreate them.
A System Restore is being carried out.
If you have been experiencing problems with the starting process after installing a new update, driver, or program, you may be able to resolve the issue by restoring your system to a prior state. You may restore the system by going to Troubleshoot > Advanced Options > System Restore from inside the Windows Recovery Environment.
In order to restore the system settings and data, choose a restore point that was generated before the problem started, and then follow the on-screen instructions. However, it is possible that System Restore may delete recent applications or upgrades that caused instability. This will not impact your personal data either.
Examination of the Hardware for Defects
When software fixes are not successful in resolving the issue, it is possible that the underlying reason is a malfunction in the hardware. The most common causes of defective power supply, bad RAM, and failed hard drives are all examples of common culprits.
Utilize diagnostic tools such as CHKDSK or third-party utilities that are given by the manufacturer of the storage device in order to examine the operation of your drive. Windows comes with a built-in tool called Windows Memory Diagnostic that can be used to test memory. Entering the name of this item into the Start menu will allow you to access it.
It is possible that it is time to replace the hard drive or you should test each component independently in a different system if you hear clicking noises that are not typical or if you see blue screens repeatedly.
When Windows is reinstalled
In the event that all other options have been exhausted, reinstalling Windows can be the most effective method for restoring complete functioning. Through the use of the Windows installation tool, it is possible to generate a bootable USB drive, boot from it, and then carry out a clean installation.
Be careful to create a backup of your vital data using a different computer or a recovery program before you attempt to reinstall the software. Although a clean installation would remove all of the data from the system disk, it is able to fix problems that have been around for a long time and are caused by viruses or damaged files.
Helping to Prevent Future Issues with Startups
Once your system is functioning normally again, you should take preventative actions to avoid restarting it in the future. Maintaining an up-to-date operating system and drivers, avoiding sudden shutdowns, and using dependable antivirus software are all important tasks. Dust should be cleaned from internal components on a regular basis to avoid overheating and to guarantee that a surge protector or an uninterruptible power supply is used appropriately to maintain steady power delivery.
It is important to generate restore points and system backups on a regular basis so that you can rapidly recover in the event that anything goes wrong again. Maintenance that is preventative may often be the deciding factor between a trouble-free restart and a tedious repair session.
The process of repairing issues with the computer’s starting does not have to be daunting. It is possible for you to diagnose and fix your system in the same manner as a professional technician if you use the appropriate approach and pay great attention to information. You may restore your computer to a functional condition and maintain it in that state for an extended period of time by doing tasks such as inspecting the connections between the hardware components, using Windows recovery tools, correcting the boot process, and maintaining a healthy system.