


Managing “Scope Creep” in the Age of AI: How to Price Freelance Services When Tools Make Work Faster
Managing "Scope Creep" in the Age of AI: How to Price Freelance Services When Tools Make Work Faster Artificial intelligence...
 How to Set Up a “Private Cloud” at Home Using TrueNAS: Bypassing Subscription Fees for Good
  The Guide to “Green IT”: How to Reduce Your Company’s Server Energy Consumption and Carbon Footprint
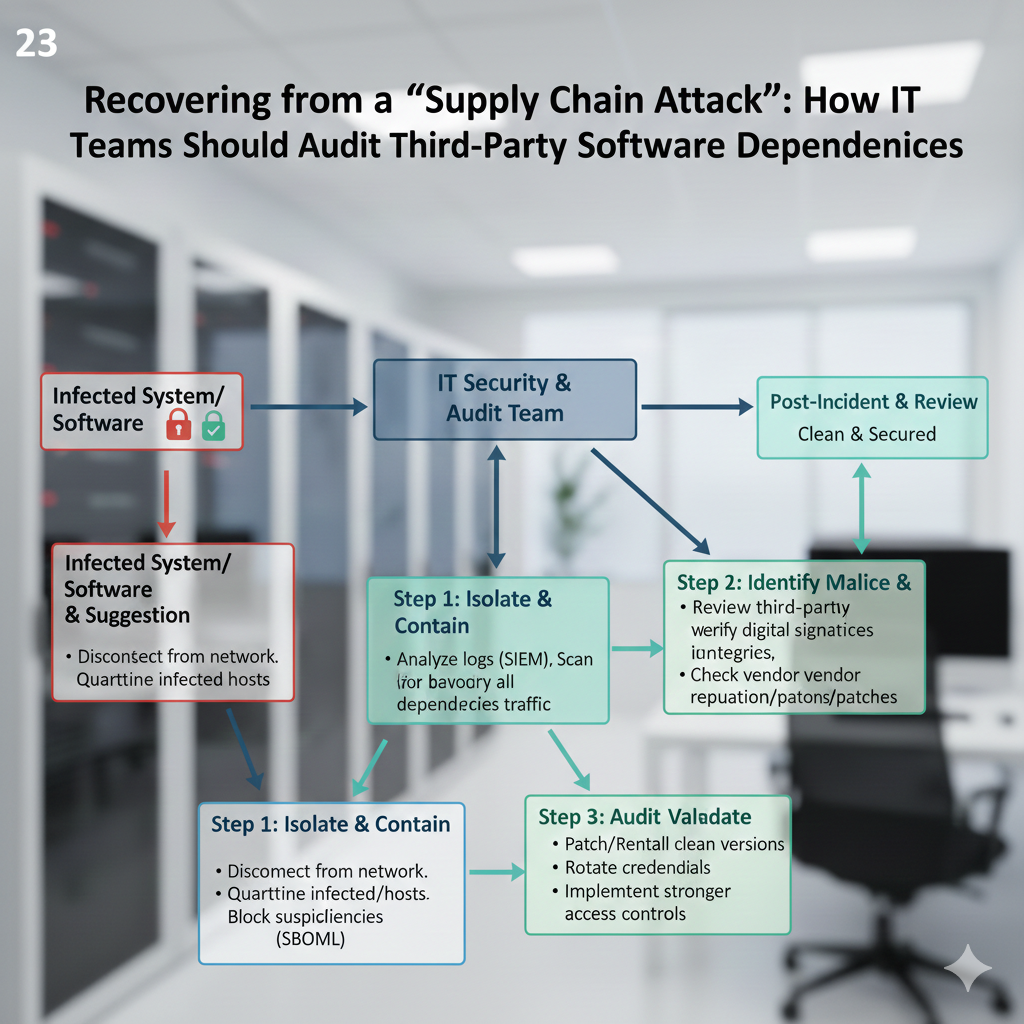
  Recovering from a “Supply Chain Attack”: How IT Teams Should Audit Third-Party Software Dependencies
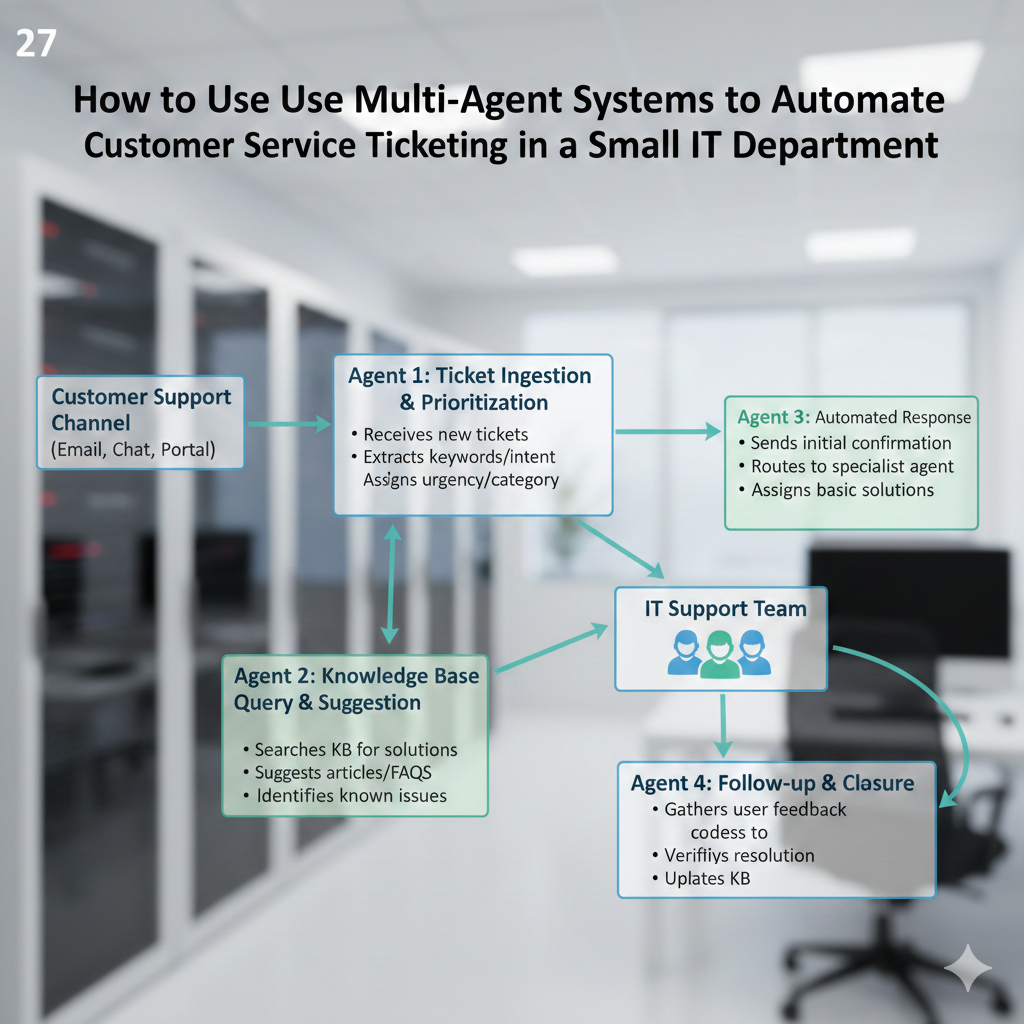
  How to Use “Multi-Agent Systems” to Automate Customer Service Ticketing in a Small IT Department
  The Best IT Practices for Managing a “Bring Your Own Device” (BYOD) Policy in 2026
 Managing "Scope Creep" in the Age of AI: How to Price Freelance Services When Tools Make Work Faster Artificial intelligence...

How to Set Up a "Local-First" Freelance Portfolio Using Obsidian and Quartz for Maximum Speed A freelance portfolio that is...

The Best Upwork Niches for 2026: Why Cybersecurity Consulting is the New High-Paying Frontier Cybersecurity has evolved from a technical...

How to Use "Agentic AI" to Automate Your Freelance Client Onboarding and Project Management The term "agentic AI" refers to...

The Legal Guide for Freelancers: How to Protect Your Creative Work from Being Scraped by AI Trainers As the usage...

How to Become an "AI Prompt Engineer" for Small Businesses: A Freelance Career Roadmap A realistic career path in artificial...

A Guide to Using NVMe Gen 5 SSDs: Do You Actually Need a Heatsink for Everyday Computing? The most recent...