


Navigating Versatility: A Comprehensive Guide on How to Enable or Disable Tablet Mode in Windows 10
Introduction: Windows 10, Microsoft's dynamic operating system, is designed to cater to a diverse range of devices, from traditional desktops...
 The Guide to “Green IT”: How to Reduce Your Company’s Server Energy Consumption and Carbon Footprint
  Recovering from a “Supply Chain Attack”: How IT Teams Should Audit Third-Party Software Dependencies
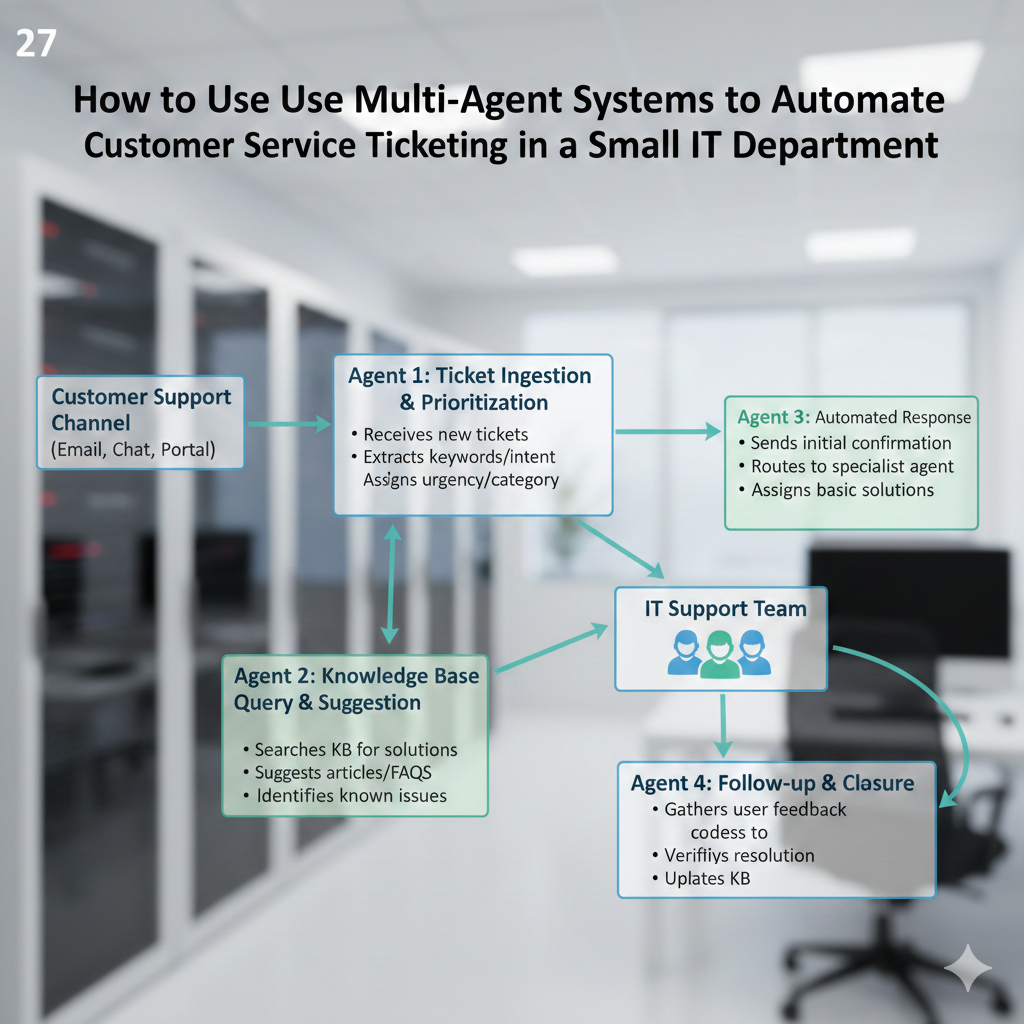
  How to Use “Multi-Agent Systems” to Automate Customer Service Ticketing in a Small IT Department
  The Best IT Practices for Managing a “Bring Your Own Device” (BYOD) Policy in 2026
  How to Fix the “Dependency Hell” in Python Environments Using Docker and Dev Containers
 Introduction: Windows 10, Microsoft's dynamic operating system, is designed to cater to a diverse range of devices, from traditional desktops...

Introduction: Windows 10, Microsoft's versatile operating system, empowers users with a multitude of applications to enhance productivity and entertainment. Over...

Introduction: In the ever-evolving landscape of cybersecurity, safeguarding your personal data is paramount. Windows 10, Microsoft's feature-rich operating system, provides...
Introduction: Windows 10, Microsoft's flagship operating system, is renowned for its user-friendly interface and versatile features. For users navigating through...
Introduction: As the cornerstone of modern computing, Windows 10 continues to evolve with each iteration, offering a feature-rich environment that...
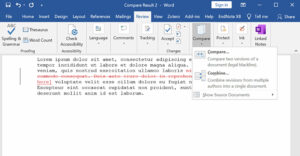
Introduction: In the realm of document management and collaboration, the ability to compare text across multiple versions is a crucial...

Introduction: In the ever-evolving digital landscape, visual aesthetics play a crucial role in user experience, and font rendering is at...