


Mastering Realism: A Comprehensive Guide to Adding Waterdrops to Your Photos in Photoshop
In the realm of digital image editing, mastering the art of realism can transform ordinary photographs into stunning works of...
 The Best Ergonomic Home Office Setup for Freelancers: Reducing Neck Pain and Eye Strain for Long Sessions
  How to Find International Clients Who Pay in Stablecoins: A Freelancer’s Guide to Crypto Payments
  Managing “Scope Creep” in the Age of AI: How to Price Freelance Services When Tools Make Work Faster
  How to Set Up a “Local-First” Freelance Portfolio Using Obsidian and Quartz for Maximum Speed
  The Best Upwork Niches for 2026: Why Cybersecurity Consulting is the New High-Paying Frontier
 In the realm of digital image editing, mastering the art of realism can transform ordinary photographs into stunning works of...
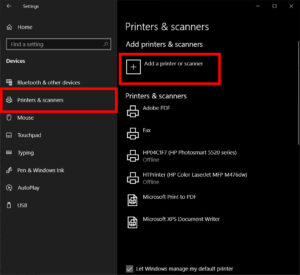
In today's digital age, the ability to seamlessly connect and integrate various devices is essential for productivity and efficiency. Printing...

In the realm of photography and digital editing, adding a spotlight behind your subject can elevate the visual impact of...
In today's interconnected world, communication knows no bounds. Whether you're writing a formal document, crafting an email, or chatting with...
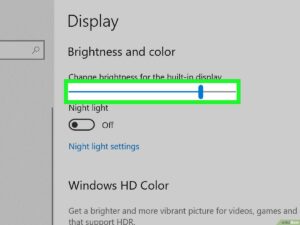
In today's digital world, accessibility is paramount. As technology becomes increasingly integrated into our daily lives, it's crucial to ensure...
Introduction: WhatsApp has revolutionized the way we communicate, offering a convenient and versatile platform for staying connected with friends, family,...
Introduction: In today's digital age, having an engaging website is essential for businesses, bloggers, artists, and individuals looking to establish...