


Mastering Windows Firewall: A Comprehensive Guide to Enabling and Disabling Windows Firewall in Windows 7
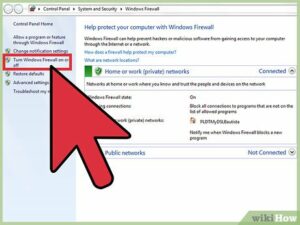
In the realm of cybersecurity, firewalls serve as critical barriers between your computer and potential threats from the outside world....
 The Best Ergonomic Home Office Setup for Freelancers: Reducing Neck Pain and Eye Strain for Long Sessions
  How to Find International Clients Who Pay in Stablecoins: A Freelancer’s Guide to Crypto Payments
  Managing “Scope Creep” in the Age of AI: How to Price Freelance Services When Tools Make Work Faster
  How to Set Up a “Local-First” Freelance Portfolio Using Obsidian and Quartz for Maximum Speed
  The Best Upwork Niches for 2026: Why Cybersecurity Consulting is the New High-Paying Frontier
 In the realm of cybersecurity, firewalls serve as critical barriers between your computer and potential threats from the outside world....
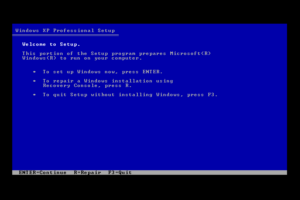
In the realm of computing, encountering system issues or errors is an inevitable part of the user experience. However, with...
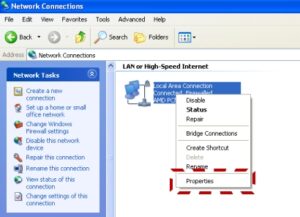
In the interconnected world of computing, sharing files and printers across a network is an essential aspect of collaboration and...
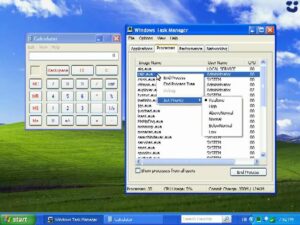
In the realm of computer systems management, effective monitoring and control of processes are essential for optimizing system performance, troubleshooting...

In the modern digital era, web browsing has become an indispensable part of our daily lives, allowing us to access...
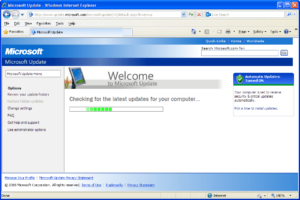
In the ever-evolving landscape of technology, staying up-to-date with the latest software updates is crucial for maintaining system security, stability,...

Introduction: Slow motion is a powerful cinematic technique that allows filmmakers and video editors to emphasize moments, enhance visual storytelling,...