


Mastering Nature’s Palette: A Comprehensive Guide to Crafting Vector Nature Illustrations in Adobe Illustrator
Introduction: In the realm of digital artistry, Adobe Illustrator stands as a premier platform for bringing the beauty and intricacies...
 How to Use “Claude Code” to Build Custom Software Tools for Your Freelance Clients Without a CS Degree
  The Best Ergonomic Home Office Setup for Freelancers: Reducing Neck Pain and Eye Strain for Long Sessions
  How to Find International Clients Who Pay in Stablecoins: A Freelancer’s Guide to Crypto Payments
  Managing “Scope Creep” in the Age of AI: How to Price Freelance Services When Tools Make Work Faster
  How to Set Up a “Local-First” Freelance Portfolio Using Obsidian and Quartz for Maximum Speed
 Introduction: In the realm of digital artistry, Adobe Illustrator stands as a premier platform for bringing the beauty and intricacies...

Introduction: GIFs (Graphics Interchange Format) have become an increasingly popular form of visual communication, allowing users to convey messages, express...
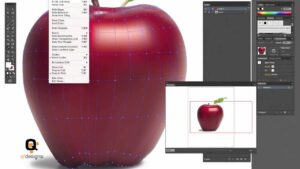
Introduction: The Gradient Mesh tool in Adobe Illustrator is a versatile and powerful feature that allows designers to create realistic...

Introduction: Social media has become an integral part of our daily lives, serving as a platform for communication, connection, and...

Introduction: The Envelope Distort tool in Adobe Illustrator is a powerful feature that allows designers to warp and manipulate objects...
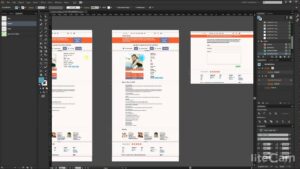
Introduction: Website mockups serve as essential blueprints for designers and developers to visualize the layout, structure, and visual design of...
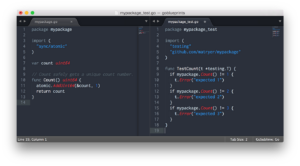
Introduction: Unit testing is a critical aspect of software development, allowing developers to verify the correctness of individual components or...