


The Complete Guide to Text Formatting in Adobe Dreamweaver: Elevate Your Typography Skills
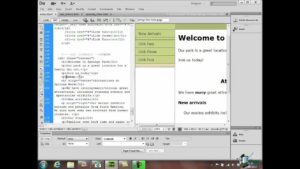
Introduction: Text formatting is a crucial aspect of web design, influencing readability, visual appeal, and user experience. Adobe Dreamweaver, a...
 How to Use “Claude Code” to Build Custom Software Tools for Your Freelance Clients Without a CS Degree
  The Best Ergonomic Home Office Setup for Freelancers: Reducing Neck Pain and Eye Strain for Long Sessions
  How to Find International Clients Who Pay in Stablecoins: A Freelancer’s Guide to Crypto Payments
  Managing “Scope Creep” in the Age of AI: How to Price Freelance Services When Tools Make Work Faster
  How to Set Up a “Local-First” Freelance Portfolio Using Obsidian and Quartz for Maximum Speed
 Introduction: Text formatting is a crucial aspect of web design, influencing readability, visual appeal, and user experience. Adobe Dreamweaver, a...
Introduction: Hyperlinks are the backbone of web navigation, connecting web pages and guiding users through online content. Adobe Dreamweaver, a...

Introduction: Images are a cornerstone of web design, adding visual appeal, conveying information, and enhancing user engagement. Adobe Dreamweaver, a...
Introduction: Text plays a vital role in web design, conveying information, enhancing visual appeal, and guiding user interaction. Adobe Dreamweaver,...
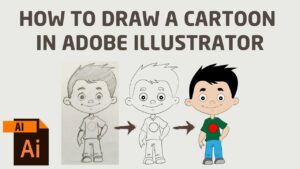
Introduction: Cartoon characters are beloved by people of all ages and have been a staple of entertainment for decades. From...
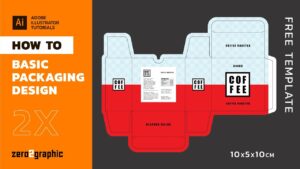
Introduction: Packaging design plays a crucial role in capturing consumer attention, communicating brand identity, and influencing purchasing decisions. Whether it's...
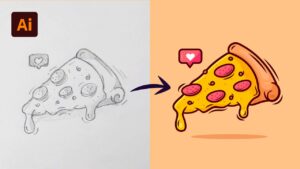
Introduction: Vector art is a versatile and powerful medium that allows artists and designers to create scalable, precise, and visually...