How to Use “Claude Code” to Build Custom Software Tools for Your Freelance Clients Without a CS Degree
  The Best Ergonomic Home Office Setup for Freelancers: Reducing Neck Pain and Eye Strain for Long Sessions
  How to Find International Clients Who Pay in Stablecoins: A Freelancer’s Guide to Crypto Payments
  Managing “Scope Creep” in the Age of AI: How to Price Freelance Services When Tools Make Work Faster
  How to Set Up a “Local-First” Freelance Portfolio Using Obsidian and Quartz for Maximum Speed


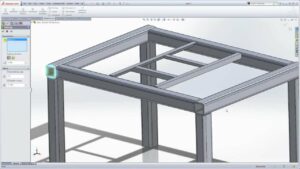
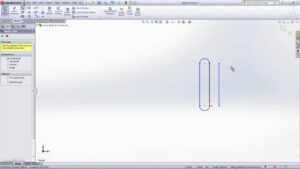
Unlocking the Power of Weldments in SolidWorks: A Comprehensive Guide to Creating and Utilizing Weldments in Your Designs
SolidWorks, renowned for its versatility and robust feature set, offers a powerful suite of tools for designing and creating weldments....