Unleashing Precision: A Comprehensive Guide on Applying Auto Image Commands as Adjustment Layers in Photoshop
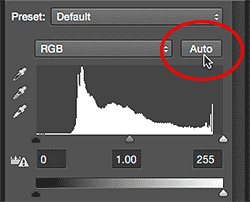
Introduction: Adobe Photoshop, the powerhouse of digital image editing, offers a plethora of tools and features to empower users in...
Introduction: Adobe Photoshop, the powerhouse of digital image editing, offers a plethora of tools and features to empower users in...

Introduction: Adobe Photoshop stands as the premier software for image manipulation and enhancement, providing a vast array of tools and...

Introduction: In the ever-evolving landscape of work, a growing number of individuals are embracing the freelance lifestyle, seeking not only...

Introduction: In the dynamic realm of freelancing, where hustle meets creativity, mastering the art of maximizing income is a constant...

Introduction: In the contemporary landscape of work, where autonomy and flexibility are prized, freelancing has emerged as an art form...

Introduction: Embarking on the journey of freelancing is akin to entering a labyrinth of opportunities and challenges, where success requires...

Introduction: In the ever-evolving landscape of work, the rise of the gig economy has ushered in a new era of...