
Crafting Visual Masterpieces: A Comprehensive Guide to Placing Multiple Images in Text with Photoshop
Introduction: Adobe Photoshop stands as a digital realm where creativity knows no bounds, offering a vast canvas for artists and...
Introduction: Adobe Photoshop stands as a digital realm where creativity knows no bounds, offering a vast canvas for artists and...

Introduction: Adobe Photoshop, a virtual playground for digital artists and designers, empowers creative minds with a vast array of tools...
Introduction: Adobe Photoshop, a venerable tool in the digital design realm, offers a treasure trove of features that empower artists...

Introduction: Adobe Photoshop, a cornerstone in the world of digital design, offers a myriad of tools and functionalities that empower...

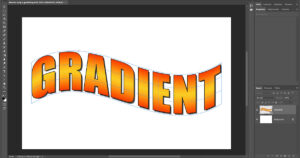
Introduction: In the vast realm of graphic design, mastering the art of text effects is a coveted skill, and among...

The Start Menu, a central hub for accessing applications and settings in Windows operating systems, serves as the gateway to...

The flicker of a powered-on PC is the heartbeat of digital productivity, but encountering a situation where the computer refuses...