Unveiling the Power of Relationships in MS Access 2016: A Comprehensive Guide
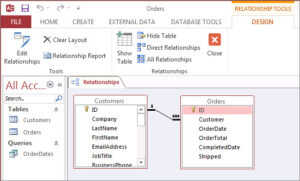
Introduction: Microsoft Access 2016 is a powerful database management system that empowers users to organize, manage, and analyze large volumes...
Introduction: Microsoft Access 2016 is a powerful database management system that empowers users to organize, manage, and analyze large volumes...
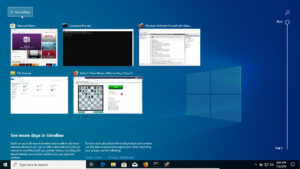
In the fast-paced world of modern computing, the ability to multitask efficiently is crucial for productivity and efficiency. Windows 10...

In the pursuit of inclusivity and accessibility, technology has continually evolved to empower users with diverse needs and abilities. One...
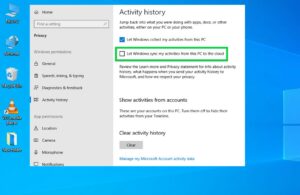
In the dynamic landscape of modern computing, users often find themselves juggling multiple tasks across various devices throughout their day....

In an era where our lives revolve around interconnected devices, the ability to seamlessly transition between our smartphones and PCs...
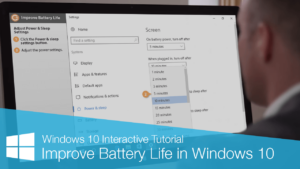
In today's fast-paced world, the ability to stay connected and productive on the go is essential. Whether you're working from...

Combining reality with rotoscope-style painting in Photoshop offers a captivating and unique approach to digital artistry. By blending elements of...


