Mastering Experimental Design in JMP: A Comprehensive Guide
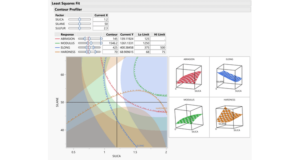
Introduction: Experimental design plays a crucial role in scientific research and industrial experimentation, enabling researchers and engineers to systematically investigate...
Introduction: Experimental design plays a crucial role in scientific research and industrial experimentation, enabling researchers and engineers to systematically investigate...

Introduction: Vibration analysis is a crucial aspect of structural engineering, used to predict and mitigate the effects of dynamic forces...
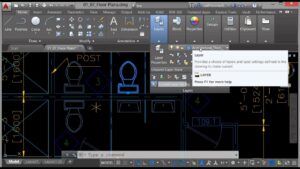
In the realm of computer-aided design (CAD), organization and management are key, and mastering the use of layers in AutoCAD...
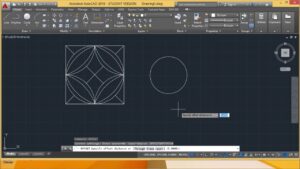
In the expansive world of computer-aided design (CAD), precision and versatility are indispensable, and mastering the techniques of offsetting and...
In the realm of computer-aided design (CAD), precision and accuracy are paramount, and knowing how to trim and extend objects...
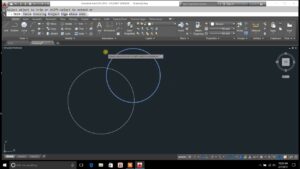
In the dynamic world of computer-aided design (CAD), the ability to manipulate objects with precision and efficiency is paramount for...
In the realm of computer-aided design (CAD), the ability to modify objects with precision and efficiency is essential for creating...


