Mastering Macro Creation in MS Word: A Comprehensive Guide to Streamlining Document Tasks
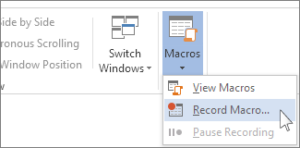
Introduction: Microsoft Word offers a wide range of features and customization options to help users streamline their document creation and...
Introduction: Microsoft Word offers a wide range of features and customization options to help users streamline their document creation and...
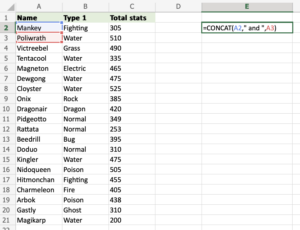
Introduction: In the vast landscape of spreadsheet manipulation, Excel offers an arsenal of functions to empower users to concatenate, manipulate,...

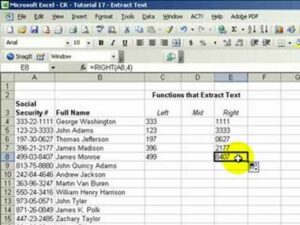
Introduction: In the realm of spreadsheet manipulation, Excel offers a plethora of functions to empower users to extract, manipulate, and...
Introduction: In the world of spreadsheet manipulation, Excel offers an array of powerful functions to help users extract, manipulate, and...
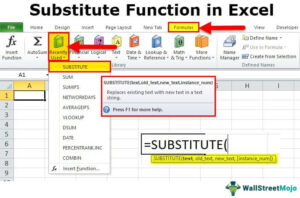
Introduction: In the realm of spreadsheet manipulation, Excel offers a plethora of functions to empower users to transform and manipulate...
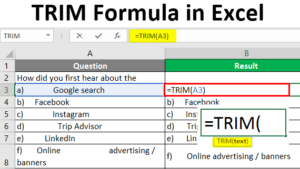
Introduction: In the world of spreadsheet management, ensuring clean and accurate data is paramount. Excel, with its array of powerful...

In the highly competitive realm of e-commerce, sellers are continually seeking innovative strategies to capture consumer attention, drive traffic, and...


