
Mastering Machining Sequence Optimization: A Comprehensive Guide for CNC Machinists
Introduction: Optimizing machining sequences is a critical aspect of CNC (Computer Numerical Control) machining that can significantly improve efficiency, reduce...
Introduction: Optimizing machining sequences is a critical aspect of CNC (Computer Numerical Control) machining that can significantly improve efficiency, reduce...
Introduction: Programming advanced cutting strategies is a crucial skill for CNC (Computer Numerical Control) machinists and programmers seeking to optimize...
Introduction: Setting up toolpath templates is a crucial aspect of CNC (Computer Numerical Control) machining that can significantly streamline production...
Introduction: Creating toolpath templates is an essential skill for CNC (Computer Numerical Control) machinists and programmers seeking to streamline their...
Introduction: CNC (Computer Numerical Control) machining has revolutionized manufacturing by allowing for precise and efficient production of a wide range...
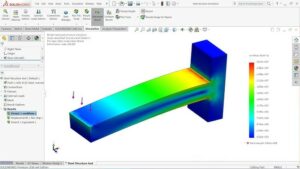
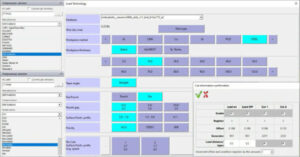
Performing stress analysis on a part in SolidWorks is a crucial step in the design process, enabling engineers and designers...
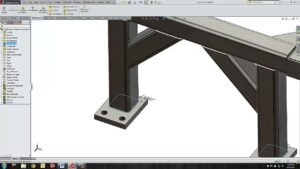
Welding is a fundamental process in fabrication, allowing engineers and designers to join metal components to create sturdy and durable...


