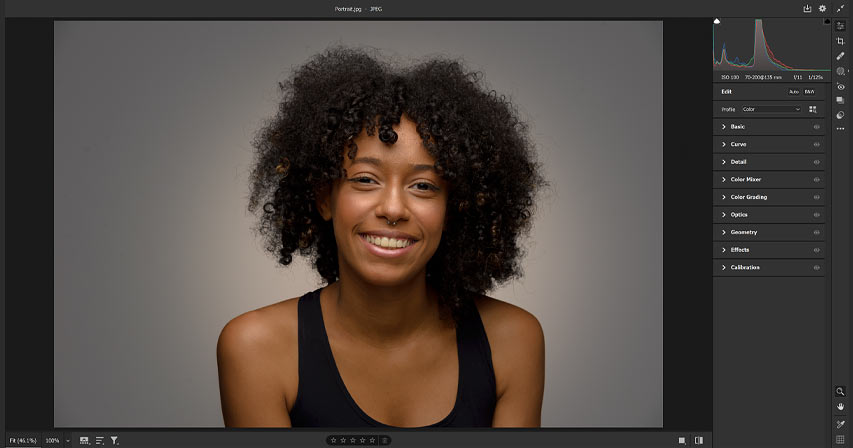
Mastering the Art of Adding a Spotlight Behind Your Object in Adobe Camera RAW: A Comprehensive Guide

In the realm of photography and digital editing, adding a spotlight behind your subject can elevate the visual impact of your images, drawing attention to the focal point and creating a captivating atmosphere. Adobe Camera RAW (ACR), a powerful tool within the Adobe Creative Cloud suite, offers photographers and digital artists the ability to enhance their images with precision and creativity. In this comprehensive guide, we’ll delve into the intricacies of adding a spotlight behind your object in Adobe Camera RAW, exploring techniques, tips, and tricks to achieve stunning results.
Understanding the Importance of Spotlights
Spotlights serve as powerful compositional elements in photography, directing the viewer’s gaze towards the main subject while adding depth and dimension to the scene. Whether used in portrait photography to highlight a subject’s features or in still life photography to create dramatic contrast, spotlights can transform ordinary images into extraordinary works of art. In Adobe Camera RAW, harnessing the power of spotlights allows photographers to enhance their images with subtlety and precision, adding visual interest and narrative depth to their compositions.
Getting Started with Adobe Camera RAW
Before diving into the specifics of adding a spotlight behind your object, it’s essential to familiarize yourself with Adobe Camera RAW and its array of features. ACR serves as a versatile platform for processing and editing raw image files, offering comprehensive tools for adjusting exposure, color balance, contrast, and more. To open an image in Adobe Camera RAW:
- Launch Adobe Photoshop or Adobe Bridge.
- Select the raw image file you wish to edit.
- Right-click on the image and choose “Open in Camera Raw” or click on the “Open” button with the raw image selected.
Once your image is open in Adobe Camera RAW, you’re ready to begin the process of adding a spotlight behind your object.
Method 1: Adjustment Brush Tool
The Adjustment Brush tool in Adobe Camera RAW allows for precise localized adjustments, making it an ideal tool for adding a spotlight effect to your images. Here’s how to use the Adjustment Brush tool to create a spotlight effect:
- Select the Adjustment Brush tool from the toolbar or press
Kas a keyboard shortcut. - Adjust the brush settings, including size, feather, flow, and opacity, to suit your preferences.
- Set the exposure, highlights, and contrast sliders to increase brightness and add intensity to the spotlight.
- Paint over the area behind your object where you want the spotlight effect to appear.
- Fine-tune the adjustments as needed by adjusting the sliders or painting over additional areas.
By carefully painting over the desired areas with the Adjustment Brush tool, you can create a realistic and customizable spotlight effect that enhances the visual impact of your image.
Method 2: Radial Filter Tool
The Radial Filter tool in Adobe Camera RAW provides another effective method for adding a spotlight effect to your images. This tool allows you to create circular or elliptical masks and apply adjustments selectively within the masked area. Here’s how to use the Radial Filter tool to create a spotlight effect:
- Select the Radial Filter tool from the toolbar or press
Shift + Mas a keyboard shortcut. - Click and drag to draw a circular or elliptical mask over the area behind your object where you want the spotlight effect to appear.
- Adjust the exposure, highlights, and contrast sliders to increase brightness and add intensity to the spotlight.
- Fine-tune the mask by adjusting its size, shape, and feathering to achieve the desired effect.
- Optionally, use the Brush tool to refine the mask or make additional adjustments within the masked area.
By strategically applying the Radial Filter tool, you can create a dynamic spotlight effect that enhances the composition and visual impact of your images.
Method 3: Graduated Filter Tool
The Graduated Filter tool in Adobe Camera RAW offers yet another approach to adding a spotlight effect, particularly when working with landscape or architectural photography. This tool allows you to apply adjustments gradually across the image, simulating the effect of a graduated filter placed in front of the lens. Here’s how to use the Graduated Filter tool to create a spotlight effect:
- Select the Graduated Filter tool from the toolbar or press
Shift + Gas a keyboard shortcut. - Click and drag to draw a graduated filter across the area behind your object where you want the spotlight effect to appear.
- Adjust the exposure, highlights, and contrast sliders to increase brightness and add intensity to the spotlight.
- Fine-tune the filter by adjusting its position, angle, and feathering to achieve the desired effect.
- Optionally, use the Brush tool to refine the filter or make additional adjustments within the filtered area.
By applying the Graduated Filter tool strategically, you can create a subtle yet impactful spotlight effect that enhances the mood and atmosphere of your images.
Conclusion
In conclusion, adding a spotlight behind your object in Adobe Camera RAW is a versatile technique that can elevate the visual impact of your images with precision and creativity. Whether using the Adjustment Brush, Radial Filter, or Graduated Filter tool, Adobe Camera RAW offers photographers and digital artists a myriad of options for creating dynamic spotlight effects that enhance composition, draw attention to the main subject, and imbue images with depth and dimension. By mastering these techniques and incorporating spotlights into your compositions thoughtfully, you can elevate your photography to new heights and captivate viewers with visually compelling imagery. With Adobe Camera RAW as your creative canvas, the possibilities for adding spotlights behind your objects are limited only by your imagination.


