Unleashing Precision: A Comprehensive Guide on Applying Auto Image Commands as Adjustment Layers in Photoshop

Introduction:
Adobe Photoshop, the powerhouse of digital image editing, offers a plethora of tools and features to empower users in their creative endeavors. Among these tools are the Auto Image Commands—Auto Tone, Auto Contrast, and Auto Color—which can be utilized not only for direct adjustments but also as adjustment layers. In this extensive guide, we will explore the advantages, techniques, and creative possibilities of applying Auto Image Commands as adjustment layers in Photoshop, providing users with a non-destructive and versatile approach to image enhancement.
I. Understanding Auto Image Commands:
A. Auto Tone:
- Auto Tone automatically adjusts the tonal values of an image to achieve a balanced and visually pleasing result.
- It optimizes the distribution of dark, mid-tone, and highlight values to enhance overall image brightness and contrast.
B. Auto Contrast:
- Auto Contrast automatically adjusts the contrast of an image, enhancing the dynamic range by making dark areas darker and light areas lighter.
- It aims to provide a more visually appealing result by balancing the distribution of tones.
C. Auto Color:
- Auto Color automatically adjusts the color balance of an image to achieve a harmonious and natural color representation.
- It corrects color casts and imbalances, ensuring a neutral and visually pleasing color rendition.
II. Advantages of Adjustment Layers:
A. Non-Destructive Editing:
- Adjustment layers allow for non-destructive editing, preserving the original image data while applying adjustments.
- Users can make changes at any point in the editing process without compromising the integrity of the original image.
B. Flexibility and Reversibility:
- Adjustment layers offer flexibility by allowing users to fine-tune adjustments or revert to the original state at any time.
- Users can experiment with various settings and easily modify adjustments without permanent changes to the image.
C. Layer Mask Integration:
- Adjustment layers come with built-in layer masks, enabling precise control over the areas affected by the adjustments.
- Users can selectively apply Auto Image Commands to specific parts of the image, enhancing localized details.
III. Applying Auto Image Commands as Adjustment Layers:
A. Auto Tone as an Adjustment Layer:
- Open your image in Photoshop.
- Click on the “New Adjustment Layer” icon at the bottom of the Layers panel.
- Choose “Levels” from the menu.
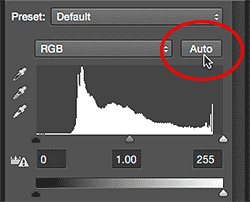
- In the Levels adjustment layer dialog box, click the “Auto” button next to “Options.”
- Select “Enhance Brightness and Contrast” and click “OK.”
B. Auto Contrast as an Adjustment Layer:
- Open your image in Photoshop.
- Click on the “New Adjustment Layer” icon.
- Choose “Brightness/Contrast” from the menu.
- In the Brightness/Contrast adjustment layer dialog box, click the “Auto” button next to “Options.”
- Adjust the sliders for additional fine-tuning and click “OK.”
C. Auto Color as an Adjustment Layer:
- Open your image in Photoshop.
- Click on the “New Adjustment Layer” icon.
- Choose “Color Balance” from the menu.
- In the Color Balance adjustment layer dialog box, click the “Auto” button next to “Selection.”
- Choose “Snap Neutral Midtones” and click “OK.”
IV. Creative Possibilities and Advanced Techniques:
A. Layer Blend Modes:
- Experiment with different layer blend modes to enhance the impact of Auto Image Commands.
- Soft Light, Overlay, and Multiply are often used for tonal adjustments, while Color blend mode can be effective for color corrections.
B. Layer Opacity and Fill:
- Adjust the opacity or fill of the adjustment layer to control the strength of the applied Auto Image Command.
- This provides a nuanced approach, allowing users to blend the adjustments seamlessly with the original image.
C. Layer Mask Refinement:
- Utilize layer masks to refine the application of Auto Image Commands to specific areas of the image.
- Paint on the layer mask with black to conceal adjustments and white to reveal them, providing precise control over the affected regions.
D. Smart Objects:
- Convert the image or layers to Smart Objects before applying Auto Image Commands as adjustment layers.
- Smart Objects allow for non-destructive transformations, preserving the original image quality even after multiple adjustments.
V. Troubleshooting and Fine-Tuning:
A. Addressing Overcorrections:
- Auto Image Commands may occasionally result in overcorrections.
- Fine-tune the adjustments manually by adjusting individual sliders in the respective adjustment layer dialog boxes.
B. Blending Multiple Adjustments:
- Combine multiple Auto Image Commands as adjustment layers for a comprehensive approach.
- Experiment with stacking Auto Tone, Auto Contrast, and Auto Color adjustment layers to achieve optimal results.
VI. Conclusion: Elevating Image Editing Precision
In conclusion, applying Auto Image Commands as adjustment layers in Photoshop opens up a realm of possibilities for precise and non-destructive image enhancement. This comprehensive guide has delved into the advantages, step-by-step application techniques, creative possibilities, and troubleshooting tips for leveraging Auto Tone, Auto Contrast, and Auto Color as adjustment layers. By incorporating these tools into your workflow, you can achieve unparalleled control over tonal values, contrast, and color balance, elevating your image editing precision and ensuring a seamless blend of creativity and technical expertise in your visual projects.


