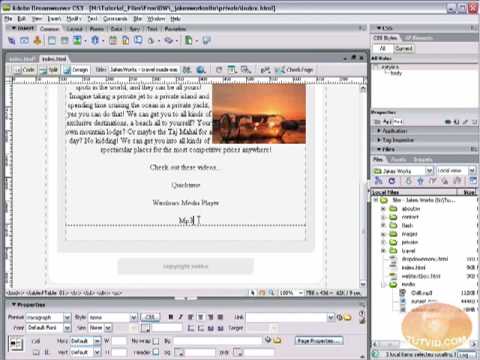
Mastering Media Embedding: A Comprehensive Guide to Embedding Videos and Audio in Adobe Dreamweaver

Introduction: In today’s digital landscape, multimedia content such as videos and audio files play a crucial role in engaging and enriching web experiences. Adobe Dreamweaver offers powerful tools and features for embedding multimedia content seamlessly into web pages, allowing designers and developers to create dynamic and interactive websites. In this comprehensive guide, we’ll explore various techniques and best practices for embedding videos and audio in Adobe Dreamweaver, covering everything from basic embedding methods to advanced customization and optimization strategies.
Understanding the Importance of Multimedia Embedding: Multimedia content adds depth, interactivity, and engagement to web pages, enhancing the user experience and conveying information in a compelling manner. Videos can be used for product demonstrations, tutorials, storytelling, and promotional content, while audio files can provide background music, podcasts, interviews, or sound effects. By embedding multimedia content directly into web pages, designers can create immersive and interactive experiences that captivate users and communicate messages effectively.
Types of Multimedia Embedding: Adobe Dreamweaver supports various methods for embedding multimedia content into web pages, including:
- Embedded Media Players: Embedding media players, such as HTML5 video and audio players or third-party players like YouTube or Vimeo, allows you to display multimedia content directly within the webpage. This method provides control over playback options, styling, and accessibility features.
- Direct File Embedding: Uploading video and audio files directly to the server and embedding them using HTML5 video and audio tags enables you to display media without relying on external services. This method offers flexibility and control over file management and hosting.
- Inline Embedding: Inline embedding involves inserting media content directly into the HTML code of the webpage using <iframe> or <object> tags. This method is suitable for embedding content from external sources such as social media platforms, streaming services, or custom embed codes.
- Script-Based Embedding: Using JavaScript or jQuery scripts, you can dynamically load and display multimedia content based on user interactions or predefined triggers. Script-based embedding offers advanced customization options and interactivity but requires programming knowledge.
Embedding Videos in Adobe Dreamweaver: To embed videos in Adobe Dreamweaver, follow these steps:
- Prepare the Video: Encode or optimize the video file in a compatible format (e.g., MP4, WebM, Ogg) and resolution for web playback.
- Insert the Video: Place the cursor at the desired location in the HTML document and select “Insert” > “Media” > “Video” from the Dreamweaver menu. Choose the video file from your local directory or server.
- Customize Settings: Use the Properties panel to adjust settings such as video dimensions, autoplay, loop, controls, and poster image.
- Test and Preview: Preview the webpage in Dreamweaver’s Live View or an external browser to ensure the video displays correctly and functions as expected.
Embedding Audio in Adobe Dreamweaver: To embed audio in Adobe Dreamweaver, follow these steps:
- Prepare the Audio: Convert or optimize the audio file in a compatible format (e.g., MP3, WAV, Ogg) and bitrate for web playback.
- Insert the Audio: Place the cursor at the desired location in the HTML document and select “Insert” > “Media” > “Audio” from the Dreamweaver menu. Choose the audio file from your local directory or server.
- Customize Settings: Use the Properties panel to adjust settings such as audio controls, autoplay, loop, and preload behavior.
- Test and Preview: Preview the webpage in Dreamweaver’s Live View or an external browser to ensure the audio plays correctly and adheres to desired settings.
Best Practices for Multimedia Embedding: To ensure optimal performance and user experience when embedding multimedia content in Adobe Dreamweaver, consider the following best practices:
- Choose Compatible Formats: Use widely supported audio and video formats (e.g., MP3, MP4) to maximize compatibility across browsers and devices.
- Optimize File Sizes: Compress and optimize multimedia files to reduce loading times and bandwidth usage without sacrificing quality.
- Provide Accessibility Features: Include descriptive captions, transcripts, and alternative text for multimedia content to ensure accessibility for users with disabilities or limitations.
- Test Across Devices and Browsers: Test multimedia content across different devices, screen sizes, and browsers to ensure consistent playback and functionality.
- Consider Bandwidth Limitations: Be mindful of users with limited bandwidth or data caps by offering options for streaming quality or providing alternative content formats.
Conclusion: Embedding multimedia content such as videos and audio files in Adobe Dreamweaver offers designers and developers a versatile and powerful tool for creating engaging and interactive web experiences. By understanding the various embedding methods, following best practices for optimization and accessibility, and testing content across different platforms, you can leverage multimedia effectively to enhance the user experience and achieve your website’s objectives. Whether you’re showcasing product demos, sharing educational content, or adding ambiance with background music, Adobe Dreamweaver provides the tools you need to integrate multimedia seamlessly into your web projects.


