Mastering Time Remapping: A Comprehensive Guide on How to Create Time Remapping Effects in After Effects

Introduction: Time remapping is a powerful technique used in motion graphics and video editing to manipulate the speed and timing of footage, creating dynamic and engaging visual effects. Adobe After Effects, a leading software for motion graphics and visual effects, offers versatile tools for implementing time remapping effects with precision and control. In this comprehensive guide, we will explore the step-by-step process of creating time remapping effects in After Effects, from setting up your project to applying keyframes and adjusting timing for professional-quality results.
Understanding Time Remapping: Time remapping, also known as speed ramping or time stretching, allows you to change the speed and timing of footage within a composition. By adding keyframes to control the playback speed at specific points in time, you can create dramatic slow-motion or fast-motion effects, manipulate the pacing of a scene, or emphasize specific moments for storytelling purposes. Time remapping offers endless creative possibilities for enhancing the visual impact and narrative flow of your videos.
Step 1: Setting Up Your Project Before creating time remapping effects in After Effects, set up your project by importing your footage into the composition. Drag and drop your video clip onto the timeline in the composition panel, or use the File > Import menu to import footage from external sources. Ensure that your footage is organized and labeled appropriately for easy editing and navigation.
Step 2: Enable Time Remapping To enable time remapping for your footage in After Effects, select the video layer in the timeline and navigate to the Layer menu. Choose Time > Enable Time Remapping from the dropdown menu to activate time remapping for the selected layer. This adds time remapping keyframes to the layer, allowing you to control the playback speed and timing.
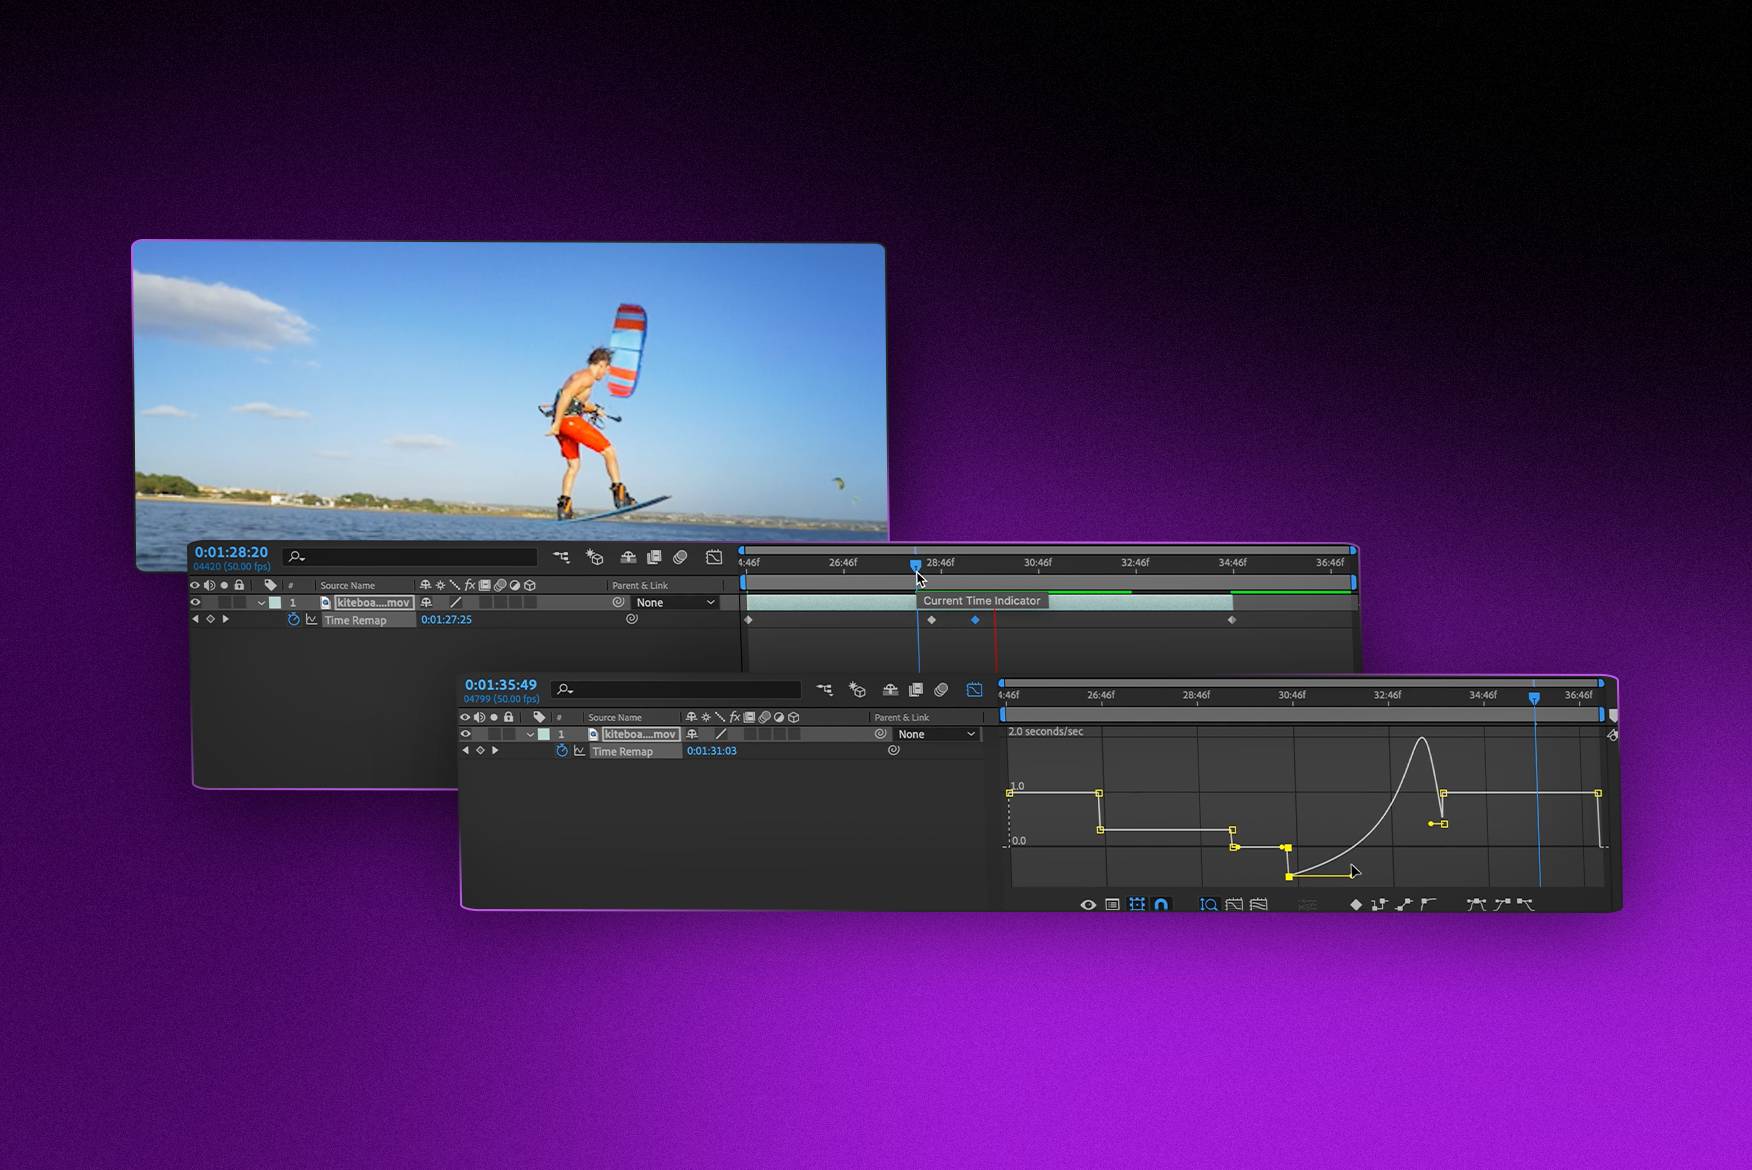
Step 3: Add Keyframes With time remapping enabled, you can now add keyframes to control the playback speed of your footage. Move the playhead to the point in time where you want to add a keyframe, then click the stopwatch icon next to Time Remap in the timeline to create a keyframe. Repeat this process to add additional keyframes at different points in time, depending on the desired timing and pacing of your video.
Step 4: Adjust Timing and Speed After adding keyframes, you can adjust the timing and speed of your footage by manipulating the position of the keyframes in the timeline. Drag the keyframes horizontally to change the playback speed between keyframes, creating smooth transitions between slow-motion and fast-motion segments. Experiment with different keyframe positions and timing intervals to achieve the desired effect.
Step 5: Create Smooth Transitions To create smooth transitions between different playback speeds, adjust the interpolation of the keyframes using the Graph Editor in After Effects. Select the keyframes you want to modify, then open the Graph Editor by clicking the Graph Editor button in the timeline. Use the handles and bezier curves in the Graph Editor to adjust the easing and acceleration of the keyframe animation, creating seamless transitions between speeds.
Step 6: Fine-Tune Timing and Pacing Once you’ve created the basic time remapping effect, fine-tune the timing and pacing of your footage to enhance the overall visual impact and narrative flow. Preview the video in real-time to see how the time remapping effect affects the pacing and rhythm of the footage. Make any necessary adjustments to the keyframes and timing intervals to achieve the desired effect.
Step 7: Add Additional Effects To further enhance your time remapping effect, consider adding additional effects and adjustments to your composition in After Effects. Experiment with color grading, visual effects, transitions, and text overlays to add depth, atmosphere, and visual interest to your video. Use the effects and presets in After Effects to explore creative possibilities and bring your vision to life.
Step 8: Preview and Export After fine-tuning your time remapping effect and adding any additional effects, preview the entire composition to ensure that everything looks and sounds as expected. Play back the video in real-time to see how the time remapping effect enhances the visual storytelling and narrative flow. Once you’re satisfied with the result, export your composition using the File > Export menu in After Effects. Choose the desired format, resolution, and bitrate for your final deliverable, and click Export to render the video with the time remapping effect applied.
Tips and Best Practices:
- Experiment with different keyframe positions and timing intervals to create unique time remapping effects.
- Use the Graph Editor to fine-tune the easing and acceleration of keyframe animations for smoother transitions.
- Combine time remapping with other effects and adjustments, such as color grading and visual effects, to create more complex and dynamic compositions.
- Keep your compositions organized and labeled to facilitate editing and navigation, especially when working with multiple layers and effects.
- Preview your compositions frequently to see how changes to the time remapping effect affect the overall visual impact and narrative flow.
Conclusion: Time remapping is a versatile and powerful technique for manipulating the speed and timing of footage in After Effects. By following the step-by-step process outlined in this guide and experimenting with different keyframe positions, timing intervals, and interpolation settings, you can create dynamic and engaging time remapping effects that enhance the visual storytelling and narrative flow of your videos. Whether you’re creating slow-motion sequences, fast-paced action scenes, or dramatic speed ramps, time remapping offers endless creative possibilities for enhancing the impact and immersion of your video projects.


