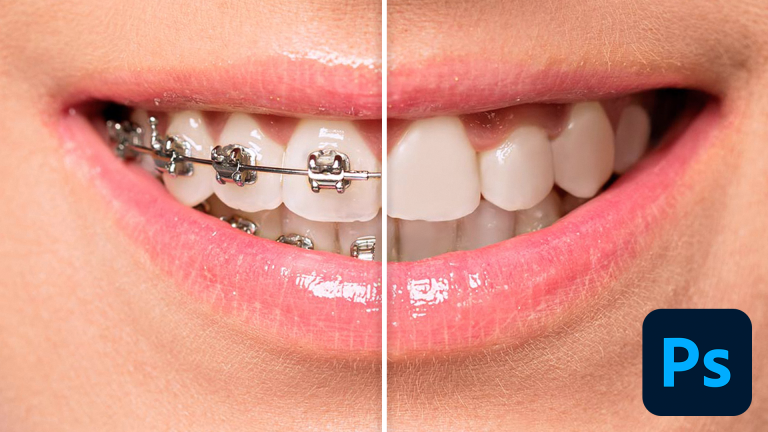
Perfecting Smiles: A Comprehensive Guide to Removing Braces in Photoshop for Easy Pro-Level Results

Introduction:
A radiant, brace-free smile is often associated with confidence and positivity. In the realm of digital image editing, Photoshop stands as a powerful ally, providing the tools to transform dental aesthetics seamlessly. In this extensive guide, we will delve into the intricate process of removing braces in Photoshop, unveiling step-by-step techniques that yield professional-level results. Whether you’re an aspiring photographer, a design enthusiast, or an individual keen on perfecting your digital portraits, this guide will equip you with the skills to effortlessly enhance smiles and create visually stunning images.
1. Understanding the Importance of a Natural Smile:
A natural, unobstructed smile is a key element in creating visually appealing portraits. While braces are a common and temporary orthodontic solution, there are instances where individuals may prefer to see themselves or others without braces in their photos. Photoshop provides a non-invasive way to achieve this, ensuring that the focus remains on the beauty of the smile itself.
2. Selecting the Right Image:
The first step in the process is selecting the right image for editing. Choose a high-resolution photograph that clearly captures the smile you want to enhance. Ensure good lighting and a well-defined smile to make the editing process smoother and more effective.
3. Duplicate the Background Layer:
Before diving into the removal process, it’s crucial to duplicate the background layer. This serves as a safety net, allowing you to compare the edited version with the original and providing the option to revert to the unedited image if needed.
4. Zooming In and Precision Editing:
Zoom in on the image to get a closer view of the braces. Precision is key in this process, and zooming in enables you to make accurate adjustments. Photoshop’s versatile selection tools, such as the Lasso Tool or the Pen Tool, can be used to outline the braces with precision.
5. Utilizing the Healing Brush Tool:
The Healing Brush Tool is a powerful asset in removing braces seamlessly. Set the brush to a suitable size and choose a sample area near the braces that matches the color and texture of the surrounding teeth. Carefully paint over the braces to blend them into the natural teeth, allowing the tool to intelligently replace the selected area.
6. Addressing Color and Tone:
Braces may cast a slight color tint on the teeth. To ensure a natural look, use Photoshop’s Color Correction tools to match the color and tone of the treated area with the surrounding teeth. This step is crucial in achieving a cohesive and realistic result.
7. Fine-Tuning with the Clone Stamp Tool:
The Clone Stamp Tool comes in handy for fine-tuning areas where the Healing Brush may require additional adjustments. Use this tool cautiously, cloning nearby areas to refine the appearance of the treated teeth and ensure a seamless integration with the overall smile.
8. Applying Dodge and Burn Techniques:
To add the final touches, employ Dodge and Burn techniques to enhance highlights and shadows. This step contributes to the overall realism of the edited image, making the treated teeth appear natural and harmonious with the rest of the smile.
9. Zooming Out and Checking for Consistency:
Once the detailed edits are complete, zoom out and assess the overall image for consistency. Ensure that the edited area blends seamlessly with the rest of the smile, and that the final result appears natural and visually pleasing.
10. Saving and Exporting the Edited Image:
Upon achieving the desired results, save the edited image in a suitable format, such as JPEG or PNG. This ensures compatibility for sharing on various platforms and allows you to showcase the transformed, brace-free smile.
Conclusion:
Removing braces in Photoshop is a skill that combines precision, creativity, and a nuanced understanding of dental aesthetics. With the right techniques and tools at your disposal, you can seamlessly enhance smiles and create visually stunning portraits. It’s essential to approach this process with sensitivity, ensuring that the final result looks natural and aligns with the individual’s unique features.
Whether you’re a photographer aiming to provide clients with picture-perfect portraits or an individual looking to refine your own digital images, mastering the art of removing braces in Photoshop offers a valuable skill set. The ability to enhance smiles and deliver pro-level results underscores the transformative power of digital image editing, empowering creators to craft captivating visuals that celebrate the beauty of natural, radiant smiles.


