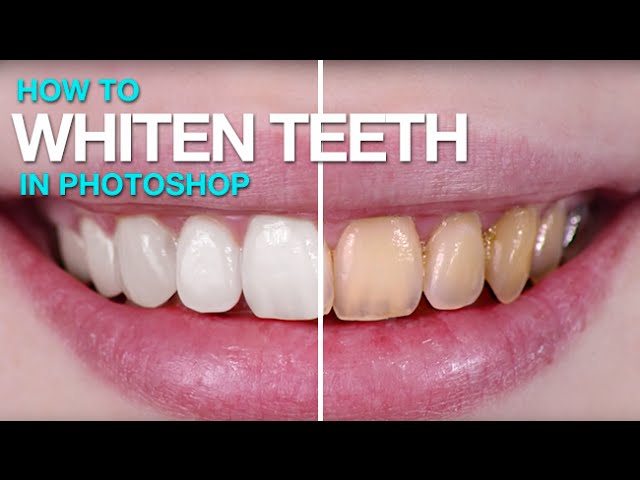
Illuminating Smiles: A Comprehensive Guide to Whitening and Brightening Teeth in Photoshop

Introduction:
In the realm of digital photography, post-processing has become an indispensable tool for enhancing the visual appeal of images. One area where photographers often seek refinement is the smile – the focal point of portraits. The quest for a radiant and captivating smile has led to the development of techniques to whiten and brighten teeth in Photoshop. In this comprehensive guide, we will explore a myriad of tools, techniques, and tips to achieve dazzling smiles that leap off the screen, creating impactful and engaging photographs.
Understanding the Importance of a Radiant Smile:
A captivating smile can transform a photograph, conveying warmth, confidence, and approachability. However, various factors such as lighting conditions, camera settings, and natural variations in tooth color can impact the overall appearance of teeth in images. Photoshop provides a powerful set of tools to address these issues, allowing photographers to enhance smiles while preserving the natural subtleties that contribute to a genuine and luminous look.
Essential Tools for Whitening and Brightening Teeth in Photoshop:
- Selection Tools:
- Begin by selecting the teeth in the image using precise selection tools like the Lasso tool or the Pen tool.
- Refine the selection to include only the teeth, ensuring that adjustments are applied exclusively to the desired area.
- Adjustment Layers:
- Leverage Adjustment Layers for non-destructive editing, enabling photographers to make changes without altering the original image.
- Commonly used adjustment layers for teeth whitening include Curves, Levels, and Hue/Saturation.
- Curves Adjustment Layer:
- Utilize the Curves Adjustment Layer to adjust the overall brightness and contrast of the teeth.
- Create an anchor point on the curve and slightly lift it to brighten the midtones, enhancing the luminosity of the teeth.
- Levels Adjustment Layer:
- The Levels Adjustment Layer allows precise control over the tonal range of the teeth.
- Adjust the sliders to enhance the highlights and shadows, fine-tuning the brightness and contrast for optimal results.
- Hue/Saturation Adjustment Layer:
- Target specific color ranges using the Hue/Saturation Adjustment Layer to address any color casts affecting the teeth.
- Reduce saturation in unwanted color channels, such as yellows, to neutralize discoloration.
- Dodge and Burn Tools:
- Refine the highlights and shadows on individual teeth using the Dodge (lighten) and Burn (darken) tools.
- Apply these tools with a soft brush at low opacity for subtle adjustments, emphasizing natural highlights and contours.
- Whitening Brushes:
- Photoshop offers specialized whitening brushes or custom brushes set to low opacity for targeted teeth whitening.
- Select a soft brush, adjust opacity, and paint over the teeth using white color to enhance their brightness while maintaining a realistic appearance.
- Clone Stamp Tool:
- Address minor imperfections or irregularities by using the Clone Stamp tool.
- Clone nearby areas to gently blend and smooth out any distracting elements, ensuring a polished and flawless smile.
Advanced Techniques for Precision and Realism:
- Layer Mask Refinement:
- Fine-tune the selection of teeth using layer masks to ensure precise adjustments.
- Use a soft brush on the layer mask to blend the edges seamlessly with the surrounding areas.
- Color Grading:
- Apply subtle color grading to the teeth to enhance their natural appearance.
- Experiment with a slight warming or cooling effect to harmonize the teeth with the overall color palette of the image.
- Texture and Detail Preservation:
- Preserve the natural texture and details of the teeth by avoiding excessive brightening or sharpening.
- Maintain a balance between enhancement and realism to create a compelling yet authentic smile.
- Selective Application:
- Consider applying teeth whitening adjustments selectively to specific teeth, especially in group portraits.
- Use the same techniques on individual teeth for consistent results across the entire smile.
- Custom Brushes for Highlights:
- Create custom brushes to add highlights and reflections to specific areas of the teeth, simulating the play of light for a three-dimensional effect.
- Adjust the brush opacity to control the intensity of highlights, ensuring a natural and realistic appearance.
- Natural Smile Enhancement:
- Avoid over-altering the shape or size of teeth, as this can lead to an unnatural look.
- Focus on enhancing the existing features of the smile rather than attempting drastic transformations.
Workflow Integration and Efficiency:
- Batch Processing:
- Streamline the teeth whitening process by applying the same adjustments to a series of images using batch processing.
- Create custom actions in Photoshop to automate repetitive tasks for efficiency.
- Presets and Templates:
- Develop presets or templates for teeth whitening to maintain consistency across multiple images.
- Save commonly used adjustment layers and settings for quick application to future photographs.
- Collaborative Editing:
- Collaborate with clients or subjects during the editing process to ensure their preferences are considered.
- Request feedback and make adjustments collaboratively for a result that aligns with the desired aesthetic.
Conclusion:
Achieving a dazzling and natural-looking smile through teeth whitening in Photoshop is a skill that enhances the visual impact of portraits. By understanding the essential tools, techniques, and advanced tips outlined in this comprehensive guide, photographers can elevate their post-processing proficiency. The balance between enhancement and realism is crucial, and precision in selection, adjustment layers, and brushwork contributes to a seamless and authentic smile.
As photographers embark on the journey of teeth whitening in Photoshop, they have the opportunity to not only enhance the aesthetics of their images but also to create portraits that radiate positivity and confidence. By integrating these techniques into their workflow, photographers can confidently illuminate smiles, capturing moments that resonate with authenticity and leave a lasting impression on viewers.


