Mastering Precision: A Comprehensive Guide to Auto-Aligning and Compositing Images in Photoshop

Introduction:
Adobe Photoshop stands as the quintessential tool for image manipulation, offering a myriad of features for photographers, graphic designers, and digital artists. Among its powerful capabilities is the ability to auto-align and composite images seamlessly. In this extensive guide, we will unravel the intricacies of auto-aligning and compositing images in Photoshop, providing users with the knowledge and skills to elevate their creative projects by seamlessly blending multiple images with precision.
I. Understanding Auto-Align in Photoshop:
A. Purpose of Auto-Align:
- Auto-Align is a feature in Photoshop designed to automatically align multiple images based on their content.
- It compensates for slight variations in perspective, angle, or position, ensuring a cohesive and well-integrated composite.
B. When to Use Auto-Align:
- Auto-Align is particularly useful when combining images taken from different perspectives, focal lengths, or angles.
- It aids in creating panoramas, HDR (High Dynamic Range) images, and composite photos with multiple elements.
C. Types of Alignment Options:
- Auto-Align offers various alignment options, including Auto, Perspective, Cylindrical, Spherical, and Collage.
- Each option addresses specific scenarios, providing flexibility in accommodating different types of images.
II. The Auto-Align Process:
A. Open Images in Photoshop:
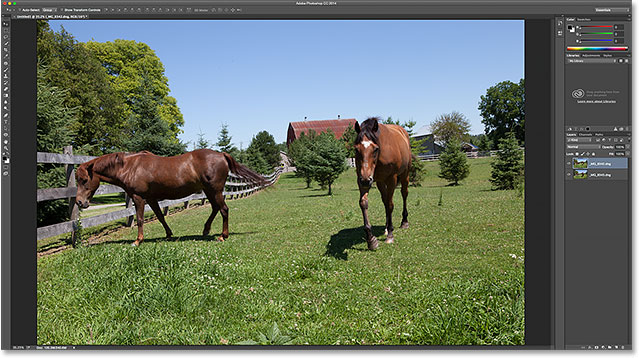
- Open the images you intend to composite in Photoshop.
- Ensure that each image is on a separate layer within the same document.
B. Accessing Auto-Align:
- Select all the layers you want to align.
- Navigate to “Edit” in the menu bar, then choose “Auto-Align Layers.”
C. Choosing Alignment Options:
- In the Auto-Align Layers dialog box, choose the appropriate alignment option based on your images.
- Click “OK” to initiate the auto-alignment process.
D. Manual Adjustment:
- In some cases, manual adjustments may be necessary after using Auto-Align.
- Use the Move tool to refine the alignment if needed.
III. Understanding Compositing in Photoshop:
A. Purpose of Compositing:
- Compositing involves combining multiple images into a single, cohesive composition.
- It allows for the creation of imaginative scenes, visual effects, and artistic expressions.
B. Techniques for Compositing:
- Layer Masks: Use layer masks to selectively reveal or conceal portions of each layer.
- Blending Modes: Experiment with blending modes to control how layers interact with each other.
- Adjustment Layers: Apply adjustment layers for global modifications to the entire composite.
IV. The Composite Image Process:
A. Layering and Arrangement:
- Arrange the layers in the desired order within the Layers panel.
- Ensure that the subject or focal point is positioned appropriately.
B. Layer Masks for Selective Blending:
- Add layer masks to each layer for precise control over which areas are visible or hidden.
- Use a soft brush to blend edges seamlessly.
C. Blending Modes for Harmonious Integration:
- Experiment with different blending modes to find the one that best suits the composite.
- Common blending modes include Overlay, Multiply, Screen, and Soft Light.
D. Adjustment Layers for Global Enhancements:
- Apply adjustment layers to enhance color, contrast, and tonal balance across the entire composite.
- Utilize tools like Curves, Levels, and Hue/Saturation for targeted adjustments.
V. Advanced Techniques for Auto-Aligning and Compositing:
A. Content-Aware Fill:
- Use Content-Aware Fill to fill in missing or unwanted areas after auto-aligning.
- Select the area to be filled, then go to “Edit” and choose “Content-Aware Fill.”
B. Smart Objects for Non-Destructive Editing:
- Convert layers to Smart Objects for non-destructive editing.
- Smart Objects preserve the original image data and allow for adjustments without compromising quality.
C. Puppet Warp for Flexibility:
- In certain compositing scenarios, Puppet Warp can be used to manipulate the shape of objects or elements.
- Access Puppet Warp under “Edit” in the menu bar.
VI. Troubleshooting and Refinement:
A. Addressing Perspective Distortions:
- In cases where perspective distortions persist, use the Perspective Crop tool for additional refinement.
- Access the Perspective Crop tool in the toolbar.
B. Dealing with Lighting Discrepancies:
- If lighting inconsistencies arise, consider adding adjustment layers with gradient masks to match lighting conditions.
- Adjustments such as Exposure and Gradient Map can help harmonize lighting.
VII. Conclusion: Elevating Your Creative Composites
In conclusion, mastering the art of auto-aligning and compositing images in Photoshop opens a realm of creative possibilities. This comprehensive guide has explored the purpose and process of auto-aligning, delving into the nuances of each alignment option. Additionally, it has provided insights into the techniques and tools for seamless compositing, enabling users to blend images with precision and finesse. By combining the power of auto-align and the artistry of compositing, users can elevate their creative projects, from crafting breathtaking panoramas to constructing imaginative visual narratives. As you embark on your journey of image manipulation in Photoshop, the fusion of auto-aligning and compositing becomes a powerful toolset, empowering you to bring your artistic visions to life with unparalleled precision.


