Mastering Precision: Crafting Multiple Text Strokes with Smart Objects in Photoshop

Introduction:
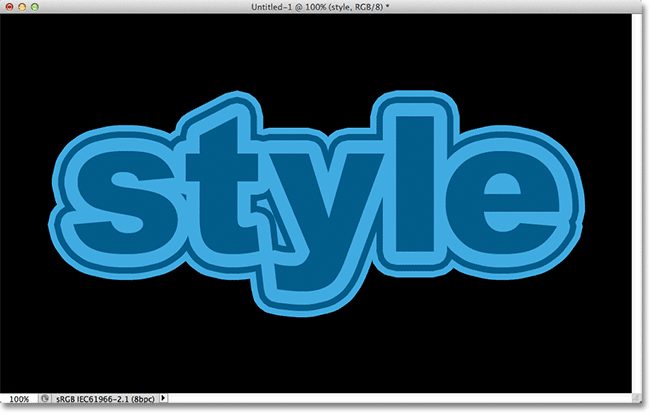
In the dynamic world of digital design, Adobe Photoshop stands as an unrivaled platform for pushing creative boundaries. Among the myriad techniques at your disposal, the art of applying multiple text strokes with Smart Objects offers a level of precision and versatility that elevates typographic design to new heights. In this extensive guide, we will delve into the step-by-step process of creating multiple text strokes, leveraging the power of Smart Objects to achieve nuanced and customizable results.
Establishing the Canvas:
Before embarking on the journey of multiple text strokes, set the stage by creating a new document in Photoshop. Determine the dimensions and resolution based on the intended purpose of your design, ensuring a canvas that accommodates your creative vision.
Choosing the Right Fonts:
Font selection plays a pivotal role in typographic design. Choose fonts that resonate with your design aesthetic and convey the intended message. Experiment with different typefaces, sizes, and styles to find the perfect combination for your multiple text strokes.
Adding Text Layers:
Activate the Text tool from the toolbar, click on the canvas, and type the desired text. Repeat this process for each distinct text layer you plan to incorporate in your design. Each text layer will serve as a foundation for a different stroke, providing flexibility and control over the final outcome.
Smart Object Conversion:
To unleash the power of Smart Objects, convert each text layer individually. Right-click on the text layer in the Layers panel, and select “Convert to Smart Object.” This step is crucial for maintaining editability and flexibility throughout the design process.
Applying the First Stroke:
With the Smart Objects in place, it’s time to apply the first stroke. Double-click on the Smart Object layer to access the Layer Style panel. Navigate to the Stroke option, adjust parameters such as size, position, and color to create the initial stroke effect. This stroke will serve as the base for subsequent layers.
Duplicating Smart Objects:
To achieve multiple text strokes, duplicate the Smart Object layer for each additional stroke you wish to apply. Right-click on the Smart Object layer, select “Duplicate Layer,” and position the duplicated layer above the original. Repeat this process for each subsequent stroke, creating a layer stack that represents the cumulative effect of multiple strokes.
Customizing Stroke Attributes:
Each duplicated Smart Object layer offers an opportunity to customize stroke attributes. Double-click on the Stroke option within the Layer Style panel for the duplicated layer, allowing you to modify parameters such as size, position, color, and opacity. This iterative process enables you to craft a layered and dynamic visual impact with your multiple text strokes.
Layer Styles for Complexity:
Explore additional layer styles to enhance the complexity of your multiple text strokes. Experiment with options such as Drop Shadow, Inner Shadow, and Outer Glow to introduce nuanced detailing. Layer styles contribute to the overall visual depth and add a layer of sophistication to your typographic design.
Dynamic Editing with Smart Objects:
One of the key advantages of Smart Objects is the ability to make dynamic edits while preserving the original text and styling. Double-click on any Smart Object layer to access the embedded contents. Adjust the text, stroke attributes, or even apply additional layer styles. The changes will automatically reflect across all duplicated Smart Object layers, ensuring a streamlined editing process.
Experimenting with Blend Modes:
Enhance the visual cohesion of your multiple text strokes by experimenting with blend modes. Blend modes dictate how layers interact with each other, offering a range of visual effects. Try modes such as Multiply, Overlay, or Screen to discover unique combinations that enhance the overall design aesthetic.
Incorporating Gradients and Textures:
For an added layer of sophistication, consider incorporating gradients or textures into your multiple text strokes. Apply Gradient Overlay within the Layer Style panel to introduce gradient effects, or experiment with textured patterns for a tactile dimension. These subtle touches contribute to the overall richness of your typographic design.
Saving and Exporting:
Once satisfied with your design, it’s time to save and share your creation. Save the Photoshop (.PSD) file to retain all layers, styles, and editability. For sharing or use in other projects, export your design as a high-quality image file (.JPEG, .PNG) while preserving transparency if necessary.
Conclusion:
Crafting multiple text strokes with Smart Objects in Photoshop is an artistic journey that combines precision with creative freedom. By leveraging the versatility of Smart Objects, you can achieve nuanced and customizable results, creating typographic designs that stand out with layered complexity. Whether you’re designing logos, posters, or digital graphics, the ability to apply multiple text strokes provides a toolkit for creating visually engaging and dynamic compositions.
So, venture into the realm of multiple text strokes, experiment with Smart Objects and layer styles, and let your creativity flourish. In the vast landscape of digital design, mastering the art of multiple text strokes with Smart Objects opens the door to a world where precision meets boundless creative expression.


