Mastering Elegance: Creating Editable Blurred Type with Layer Styles in Photoshop
Emily February 9, 2024
Introduction:
In the realm of digital design, blending creativity with functionality is an art form, and Adobe Photoshop stands as the ultimate canvas for such endeavors. One enchanting technique that effortlessly merges sophistication with versatility is the creation of editable blurred type using layer styles. In this comprehensive guide, we’ll unravel the step-by-step process, exploring layer styles, customization options, and creative applications that elevate your typographic designs to new heights.
Setting the Stage:
Before delving into the intricacies of editable blurred type, establish your canvas. Open Photoshop, create a new document, and set dimensions that align with your design intent. The choice of canvas size depends on factors like the intended platform, resolution, and overall design aesthetic.
Choosing the Right Font:
Font selection plays a pivotal role in typographic design. Choose a font that complements your project’s theme, ensuring readability and aesthetic harmony. Whether it’s a sleek sans-serif for a modern look or an ornate script for a touch of elegance, the font sets the tone for your editable blurred type.
Adding Text to the Canvas:
Activate the Text tool from the toolbar, click on the canvas, and type the desired text. Experiment with font size, color, and alignment to achieve the initial look for your editable text. Once satisfied, convert the text layer to a Smart Object. This step preserves the text’s editability and allows for non-destructive application of layer styles.
Applying the Gaussian Blur:
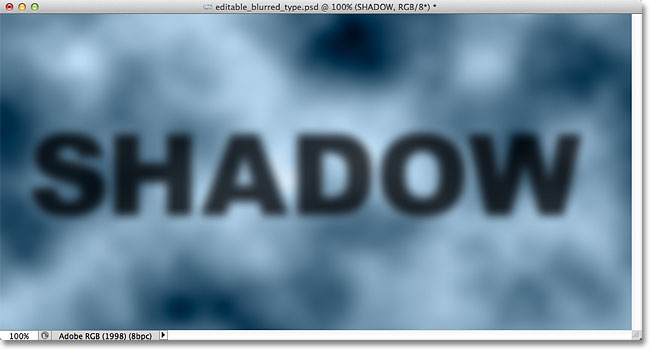
The magic begins with the application of the Gaussian Blur. Select the Smart Object layer, navigate to the Filter menu, choose Blur, and then Gaussian Blur. Adjust the radius until you achieve the desired level of blurriness. This step introduces a soft, elegant blur to the text while maintaining its editable nature through the Smart Object.
Layer Styles for Elegance:
Now comes the transformative application of layer styles to infuse your editable blurred type with elegance. Double-click on the Smart Object layer to access the Layer Style panel. Here, explore various options to tailor the appearance of your text:
Drop Shadow:
Enhance the three-dimensional quality of your editable text by adding a subtle drop shadow. Adjust settings such as opacity, distance, and size to achieve the desired shadow effect, providing depth and sophistication.
Outer Glow:
Introduce a soft, luminous halo around your editable text using the Outer Glow layer style. Experiment with opacity, size, and color to create a gentle glow that adds a touch of ethereality to the blurred type.
Stroke:
For a refined border that defines your editable text, utilize the Stroke layer style. Adjust parameters like size, position, and color to customize the stroke appearance. This subtle outlining enhances the visibility and elegance of your text.
Color Overlay:
Transform the color of your editable blurred type with the Color Overlay layer style. Choose a hue that complements your overall design or experiment with gradient overlays to add visual interest. This layer style allows for versatile color customization.
Satin:
Introduce a silky, reflective sheen to your editable text using the Satin layer style. Adjust settings such as distance, size, and contour to control the satin effect. This layer style imparts a luxurious quality to the blurred type.
Dynamic Adjustments with Smart Filters:
One of the advantages of using Smart Objects is the ability to make dynamic adjustments even after applying filters. Revisit the Gaussian Blur settings or fine-tune layer styles by double-clicking on the Smart Object layer. This flexibility ensures that your editable blurred type remains responsive to your design vision.
Experimenting with Blend Modes:
Elevate your typographic design by experimenting with blend modes. Blend your editable blurred type seamlessly with the background or other elements by toggling through modes like Multiply, Overlay, or Soft Light. This step adds an extra layer of visual sophistication to your design.
Incorporating Gradient Overlays:
For a captivating gradient effect, explore Gradient Overlay within the Layer Style panel. Apply gradients to your editable blurred type, experimenting with various color combinations and blending options. Gradient overlays introduce depth and dimension, enhancing the overall aesthetic.
Saving and Exporting:
Once satisfied with your masterpiece of editable blurred type, it’s time to save and share your creation. Save the Photoshop (.PSD) file to retain all layers and editability. For sharing or use in other projects, export your design as a high-quality image file (.JPEG, .PNG) while preserving transparency if necessary.
Conclusion:
Creating editable blurred type with layer styles in Photoshop is an artistic journey that seamlessly combines elegance with practicality. Through the strategic application of Gaussian Blur, layer styles, and dynamic adjustments, you transform basic text into a visually stunning and editable design element. The interplay of shadows, glows, strokes, and color overlays adds a layer of sophistication that transcends traditional typography.
Whether you’re crafting a sleek web banner, an eye-catching poster, or a stylish social media graphic, this technique offers boundless creative possibilities. So, embark on your typographic adventure, experiment with layer styles, and watch as your editable blurred type becomes a focal point of elegance in your digital designs. In the realm of Photoshop artistry, the marriage of editable text and graceful blurring opens doors to a realm where creativity knows no bounds.


