A Comprehensive Guide to Connecting a Microphone to Your Mac or Windows Computer

Introduction:
In the evolving landscape of digital communication, the ability to connect a microphone to your computer is a fundamental skill. Whether you’re a content creator, podcaster, musician, or simply someone looking to enhance the audio quality of video calls, understanding the process of connecting a microphone to your Mac or Windows computer is crucial. This comprehensive guide will walk you through the steps, providing detailed insights into both operating systems and addressing common issues that may arise during the setup process.
Part 1: Understanding Microphone Types and Connectors
Before delving into the specifics of connecting a microphone to your computer, it’s essential to familiarize yourself with different microphone types and connectors. Microphones come in various forms, including USB, XLR, and 3.5mm jack microphones.
- USB Microphones: These are plug-and-play devices that connect directly to your computer’s USB port. They are convenient for users seeking simplicity and ease of setup, making them an excellent choice for beginners.
- XLR Microphones: Typically used in professional settings, XLR microphones require an audio interface to connect to your computer. They offer higher audio quality and are favored by musicians, podcasters, and recording artists.
- 3.5mm Jack Microphones: Commonly found in headsets and lapel microphones, these can connect directly to your computer’s audio input or microphone jack. However, some computers may require an adapter for this type of connection.
Part 2: Connecting a USB Microphone to Your Computer
Connecting a USB microphone is a straightforward process that involves a few simple steps.
- Locate an available USB port on your computer: USB microphones usually come with a USB-A or USB-C connector. Plug the USB end of the microphone cable into an available USB port on your computer.
- Wait for the computer to recognize the microphone: In most cases, your computer will automatically detect the USB microphone and configure it as the default audio input device. If not, you may need to select the microphone manually in your computer’s audio settings.
- Adjust settings: Once connected, you can fine-tune microphone settings such as volume and gain through your computer’s operating system or specific software provided with the microphone.
Part 3: Connecting an XLR Microphone to Your Computer
Connecting an XLR microphone requires an additional step, as you’ll need an audio interface to bridge the gap between the microphone and your computer.
- Select an audio interface: Choose an audio interface compatible with your computer and XLR microphone. Common options include Focusrite Scarlett, PreSonus AudioBox, and Behringer UMC series.
- Connect the XLR microphone to the audio interface: Use an XLR cable to connect the microphone to the audio interface. Ensure a secure connection by firmly attaching the connectors.
- Connect the audio interface to your computer: Use a USB or Thunderbolt cable to connect the audio interface to an available port on your computer.
- Install drivers (if necessary): Some audio interfaces may require driver installation. Check the manufacturer’s website for the latest drivers and follow the installation instructions.
- Configure audio settings: Once connected, access your computer’s audio settings to select the audio interface as the default input device. Adjust settings as needed to optimize audio quality.
Part 4: Connecting a 3.5mm Jack Microphone to Your Computer
If you have a microphone with a 3.5mm jack, follow these steps to connect it to your computer.
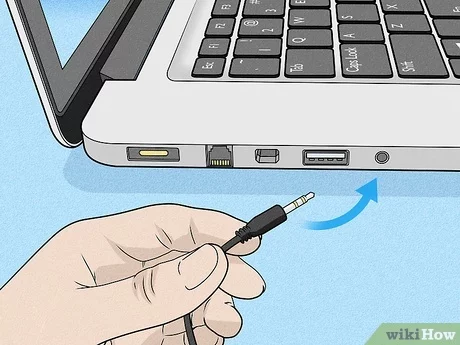
- Identify the appropriate jack: Most computers have separate jacks for audio input and output. Locate the microphone jack, usually marked with a microphone icon or the color pink.
- Use the correct adapter (if necessary): Depending on your computer’s configuration, you may need an adapter to convert the 3.5mm jack to the appropriate connector type.
- Insert the microphone jack: Plug the 3.5mm jack into the microphone input on your computer. Ensure a secure connection to prevent audio issues.
- Configure audio settings: Access your computer’s audio settings to select the microphone as the default input device. Adjust settings, such as input volume, to optimize audio quality.
Common Troubleshooting Tips:
- Check cables and connections: Ensure all cables are securely connected to both the microphone and the computer. Replace any faulty cables.
- Update drivers: Keep your computer’s audio drivers and, if applicable, the drivers for your audio interface up to date.
- Restart your computer: Sometimes, a simple restart can resolve issues related to unrecognized devices or driver glitches.
- Test in different applications: Verify that the microphone works by testing it in various applications, such as voice recording software or video conferencing platforms.
- Check power sources: If your microphone requires power (common with some condenser microphones), ensure it is receiving power from the appropriate source.
Conclusion:
Connecting a microphone to your Mac or Windows computer is an essential skill that opens up a world of possibilities for content creation, communication, and creative expression. Whether you opt for a USB, XLR, or 3.5mm jack microphone, understanding the specific steps for your chosen device and troubleshooting potential issues will empower you to make the most of your audio equipment. As technology continues to advance, the ability to seamlessly integrate microphones into our digital workflows becomes increasingly valuable, making this guide a valuable resource for users of all levels of expertise.


